目次 [INDEX]
【ステップガイド】壊れかけたドライブからのデータ復旧方法
基本方針:不良セクタを事前検出し、安全に復旧
- まずはメニューの「完全・詳細スキャン設定」より「アドバンストデータ復旧」を選択します。
- 対象ドライブを選び、「詳細スキャン」をクリック。
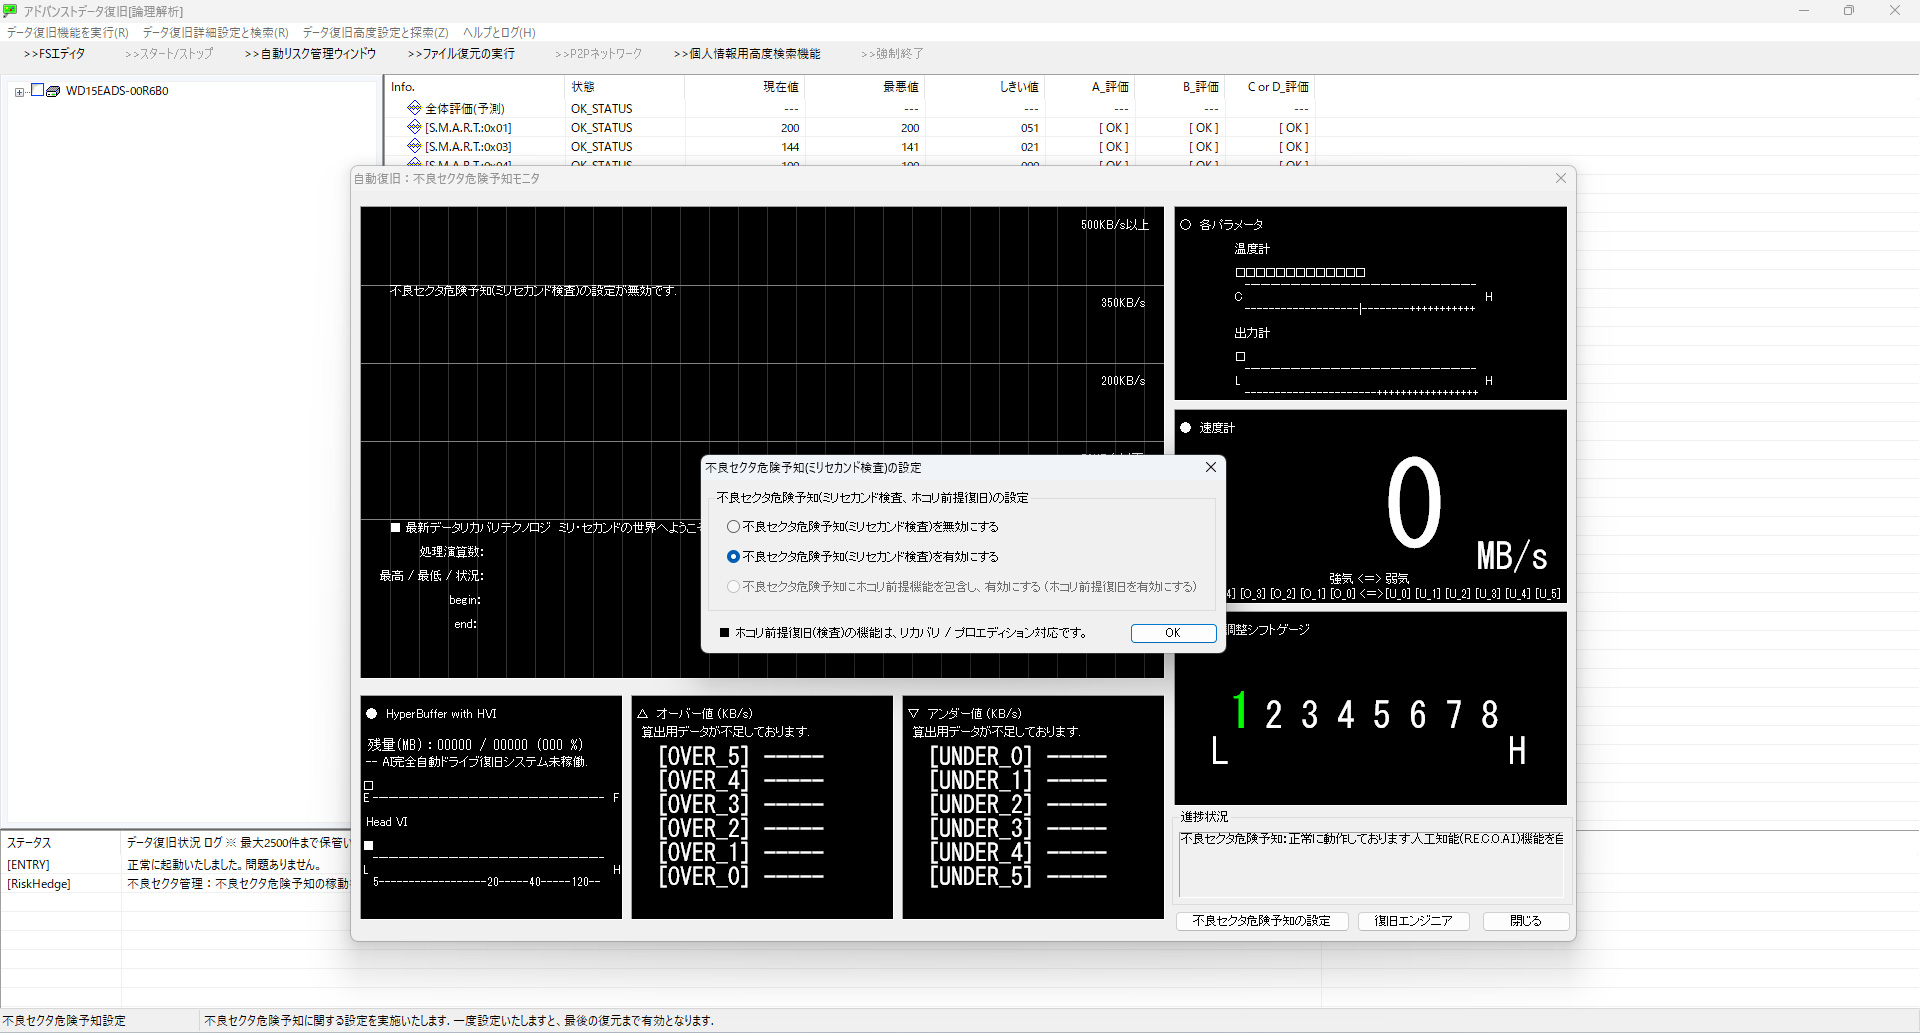
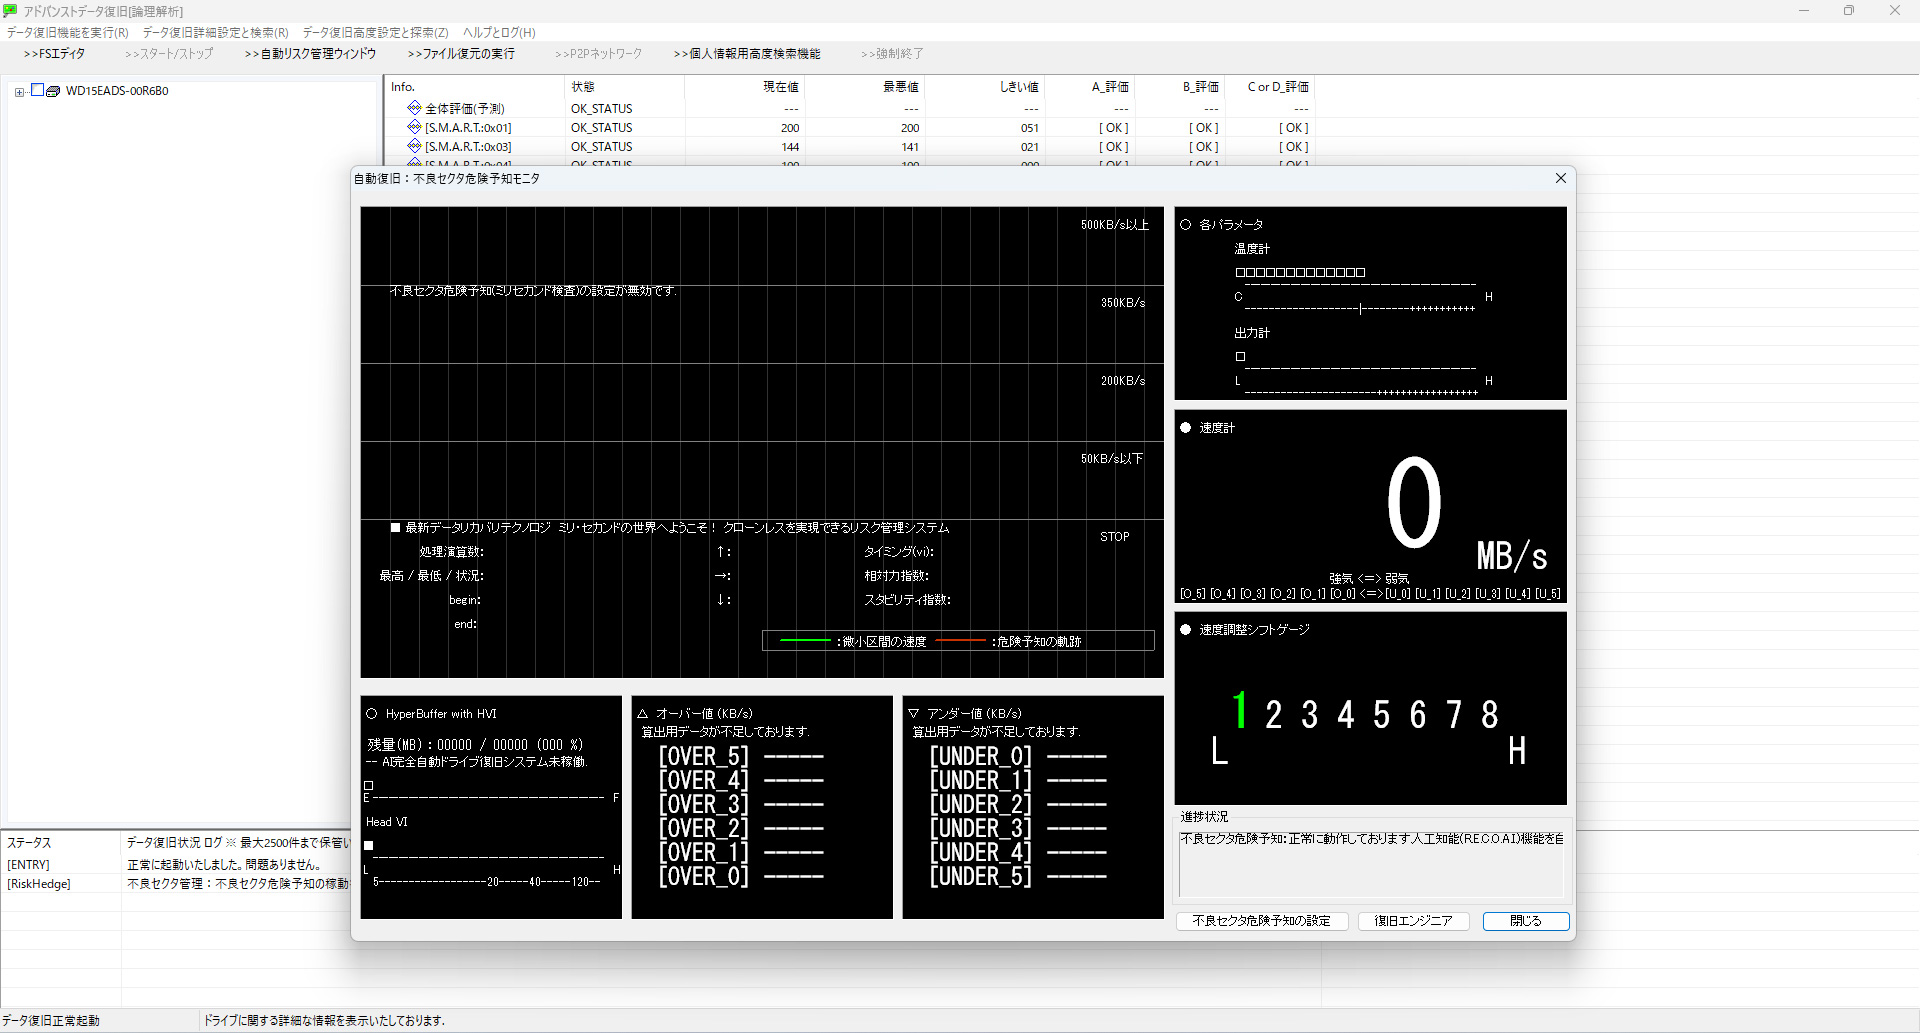
- 続いて「>>自動リスク管理ウィンドウ」を開き不良セクタ危険予知(ミリセカンド検査)を中央モードで有効にしておきます。
① ファイルまたはディレクトリ破損
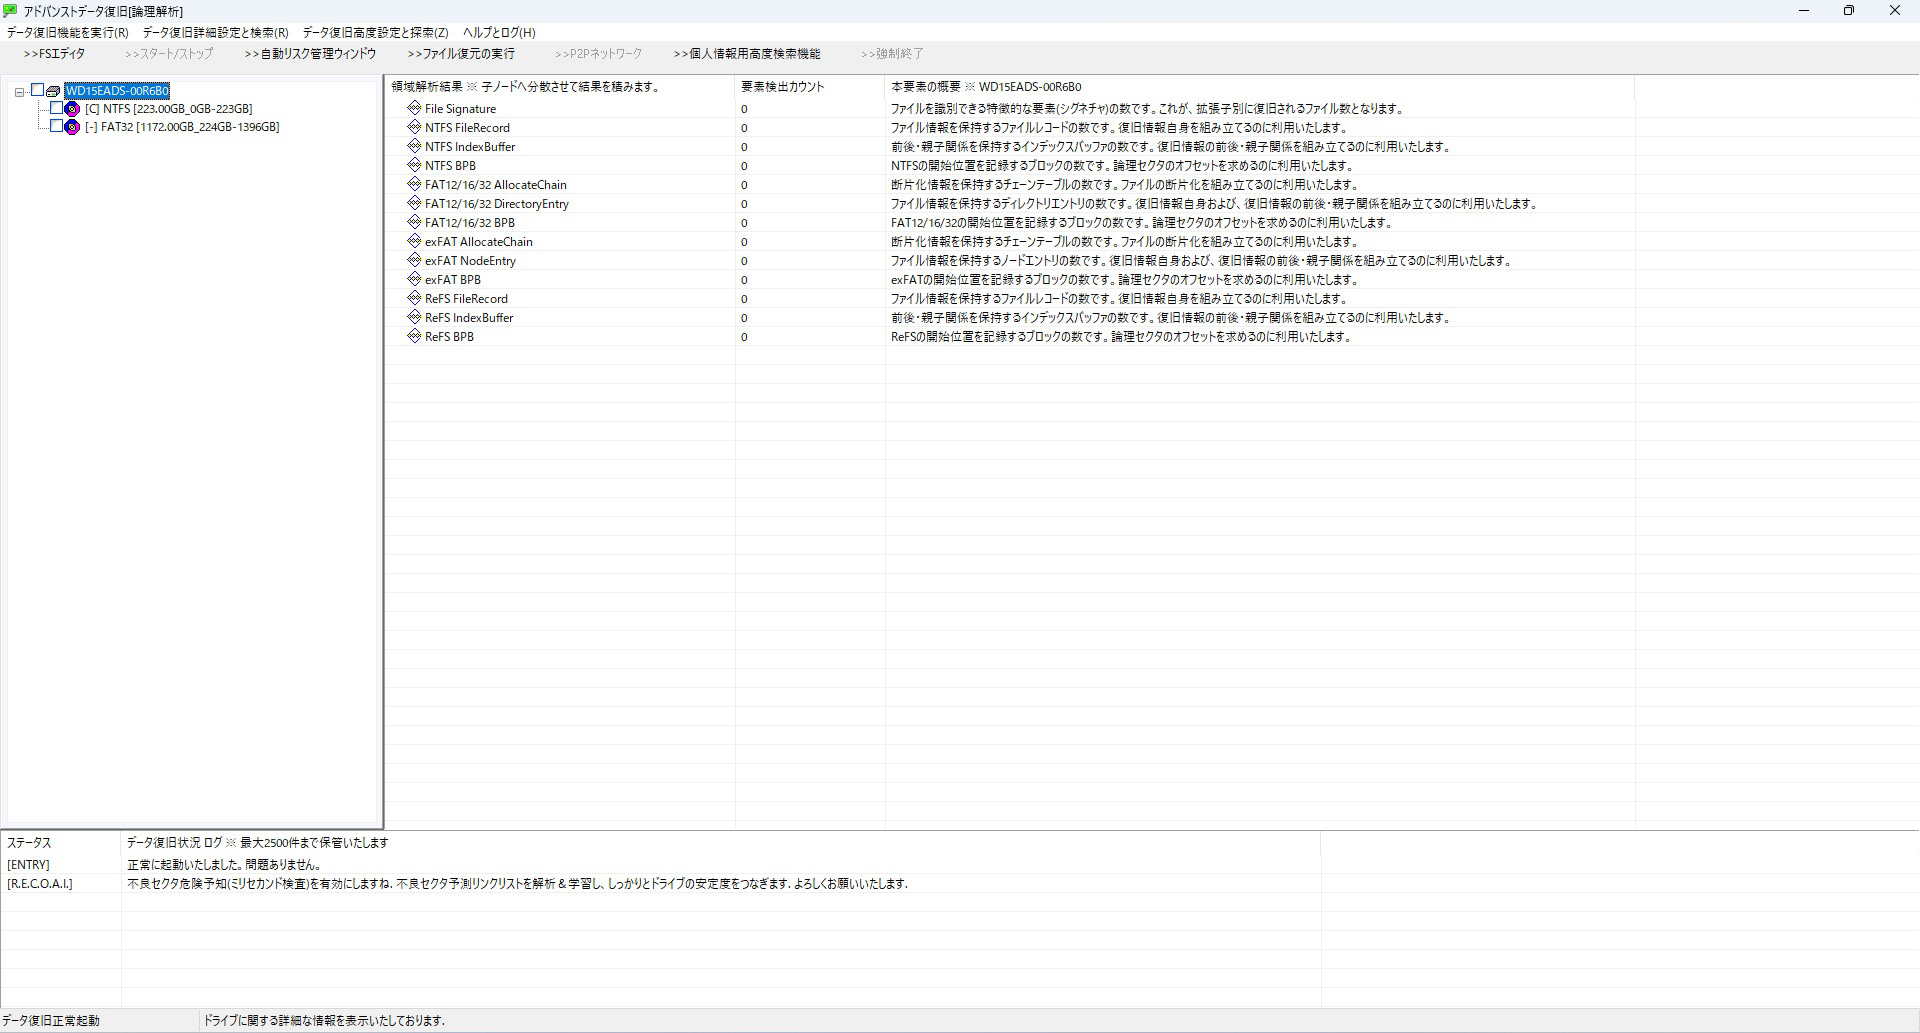
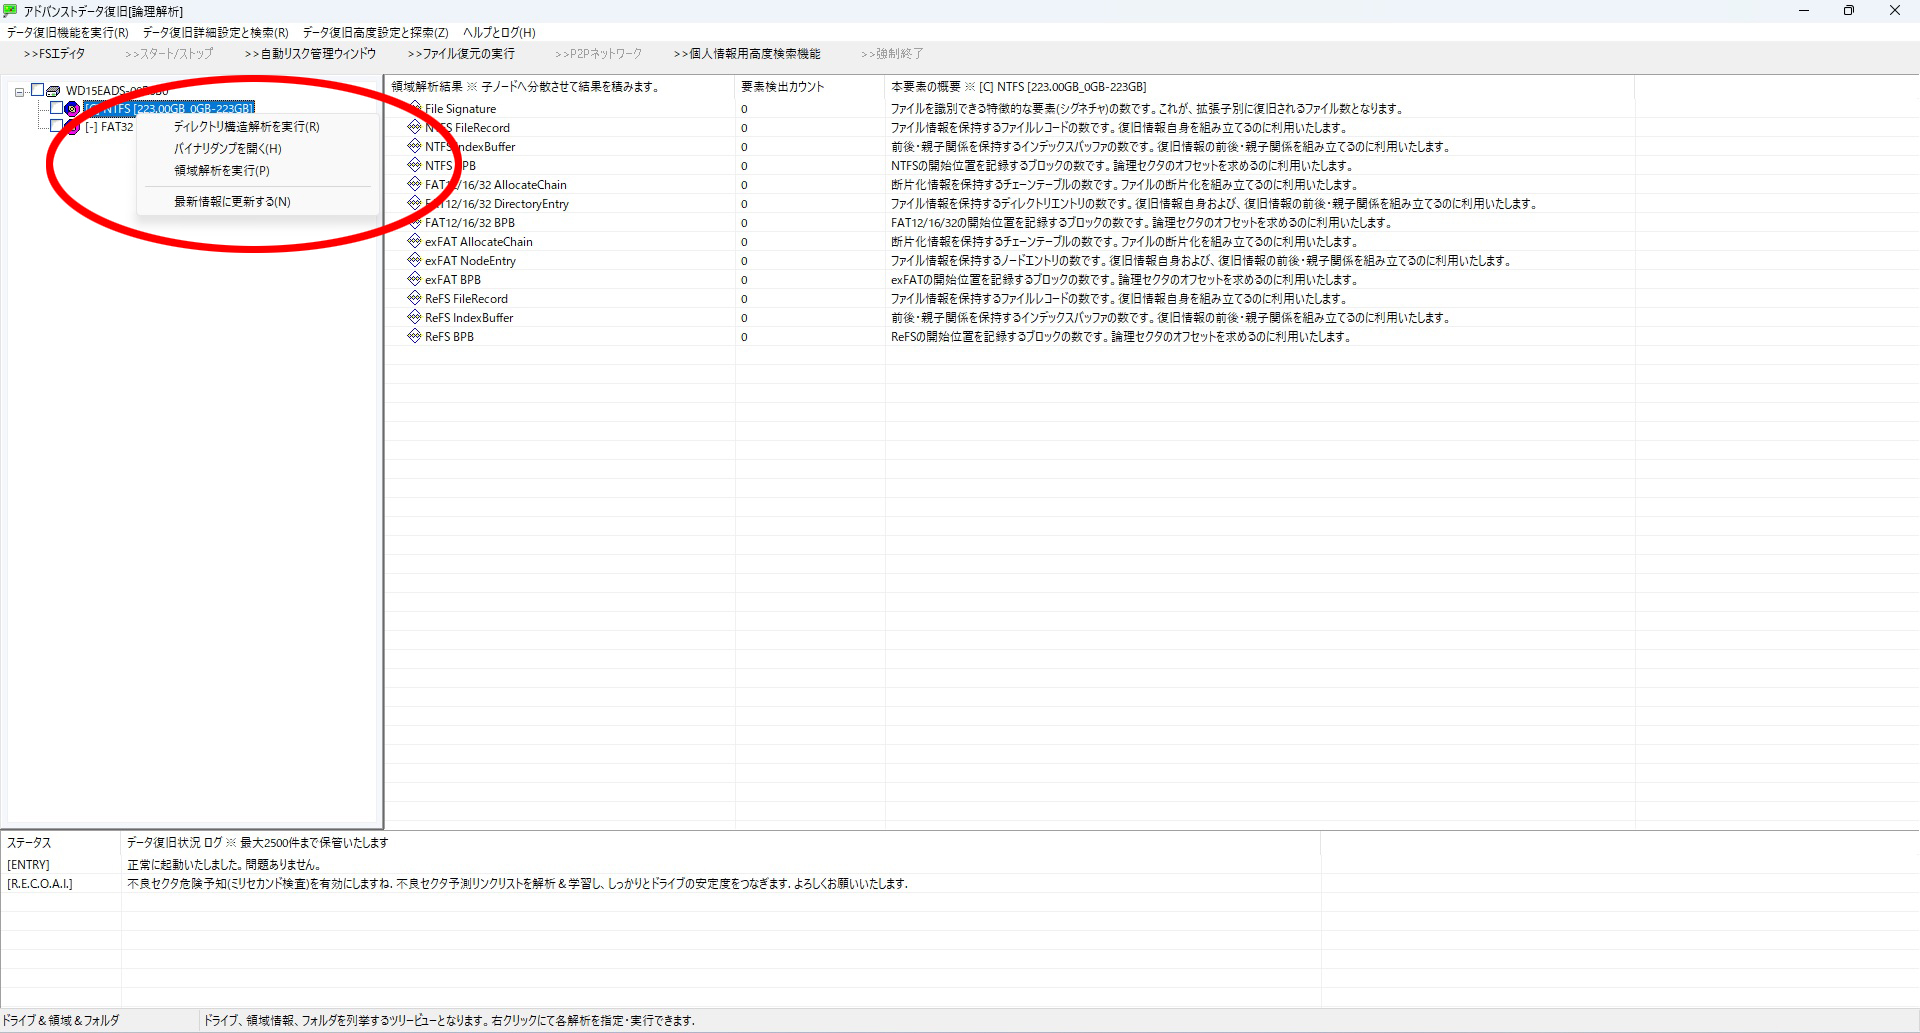
- スキャン後に表示される領域ノードを右クリックし「ディレクトリ構造解析」を実行。
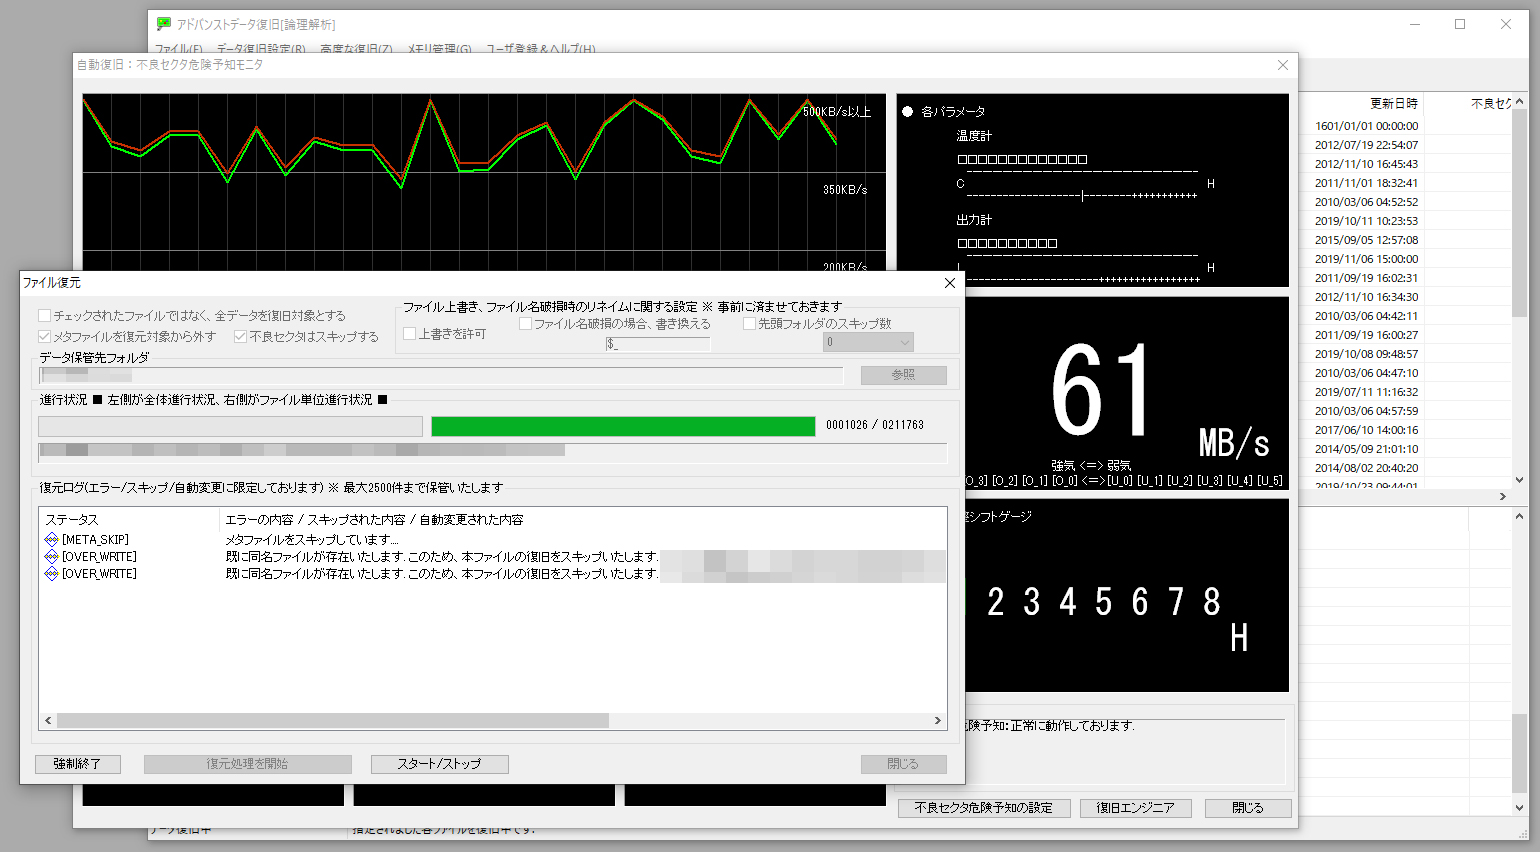
- 解析結果に表示される「Root」フォルダを選択し対象ファイルにチェックを入れて復元を実行。
② 誤削除されたデータの復旧
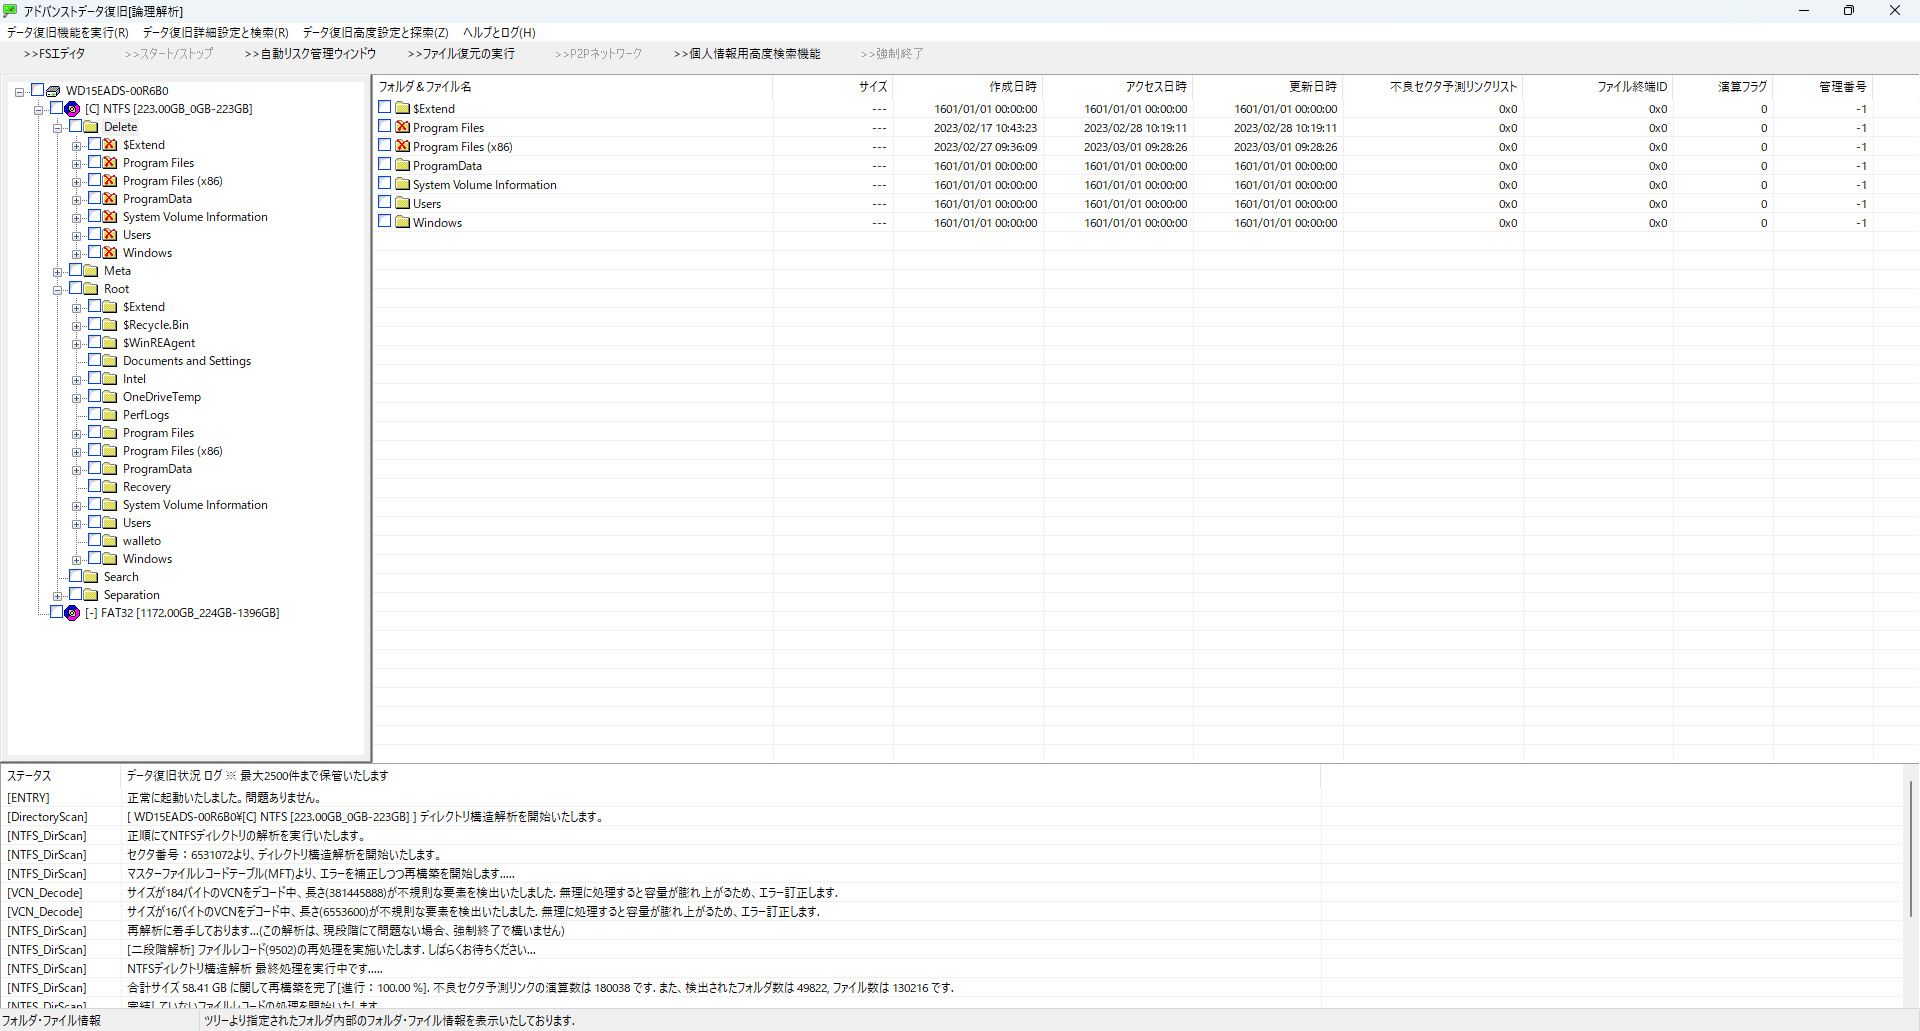
- 領域ノードを右クリックし「ディレクトリ構造解析」を実行。
- 削除されたファイル・フォルダは「Delete」フォルダに分類されます。
- 復元対象をチェックして、「>> 復元実行」で書き出し。
③ 誤フォーマットされたドライブの復旧
- フォーマット対象のノードを選び「領域解析」→「ディレクトリ構造解析」を実行。
- 白い丸印付き(◎)のノードが精度の高い候補です。
- 復旧したいファイルを選択し「>> 復元実行」。
④ パーティション削除後の復旧(領域削除)
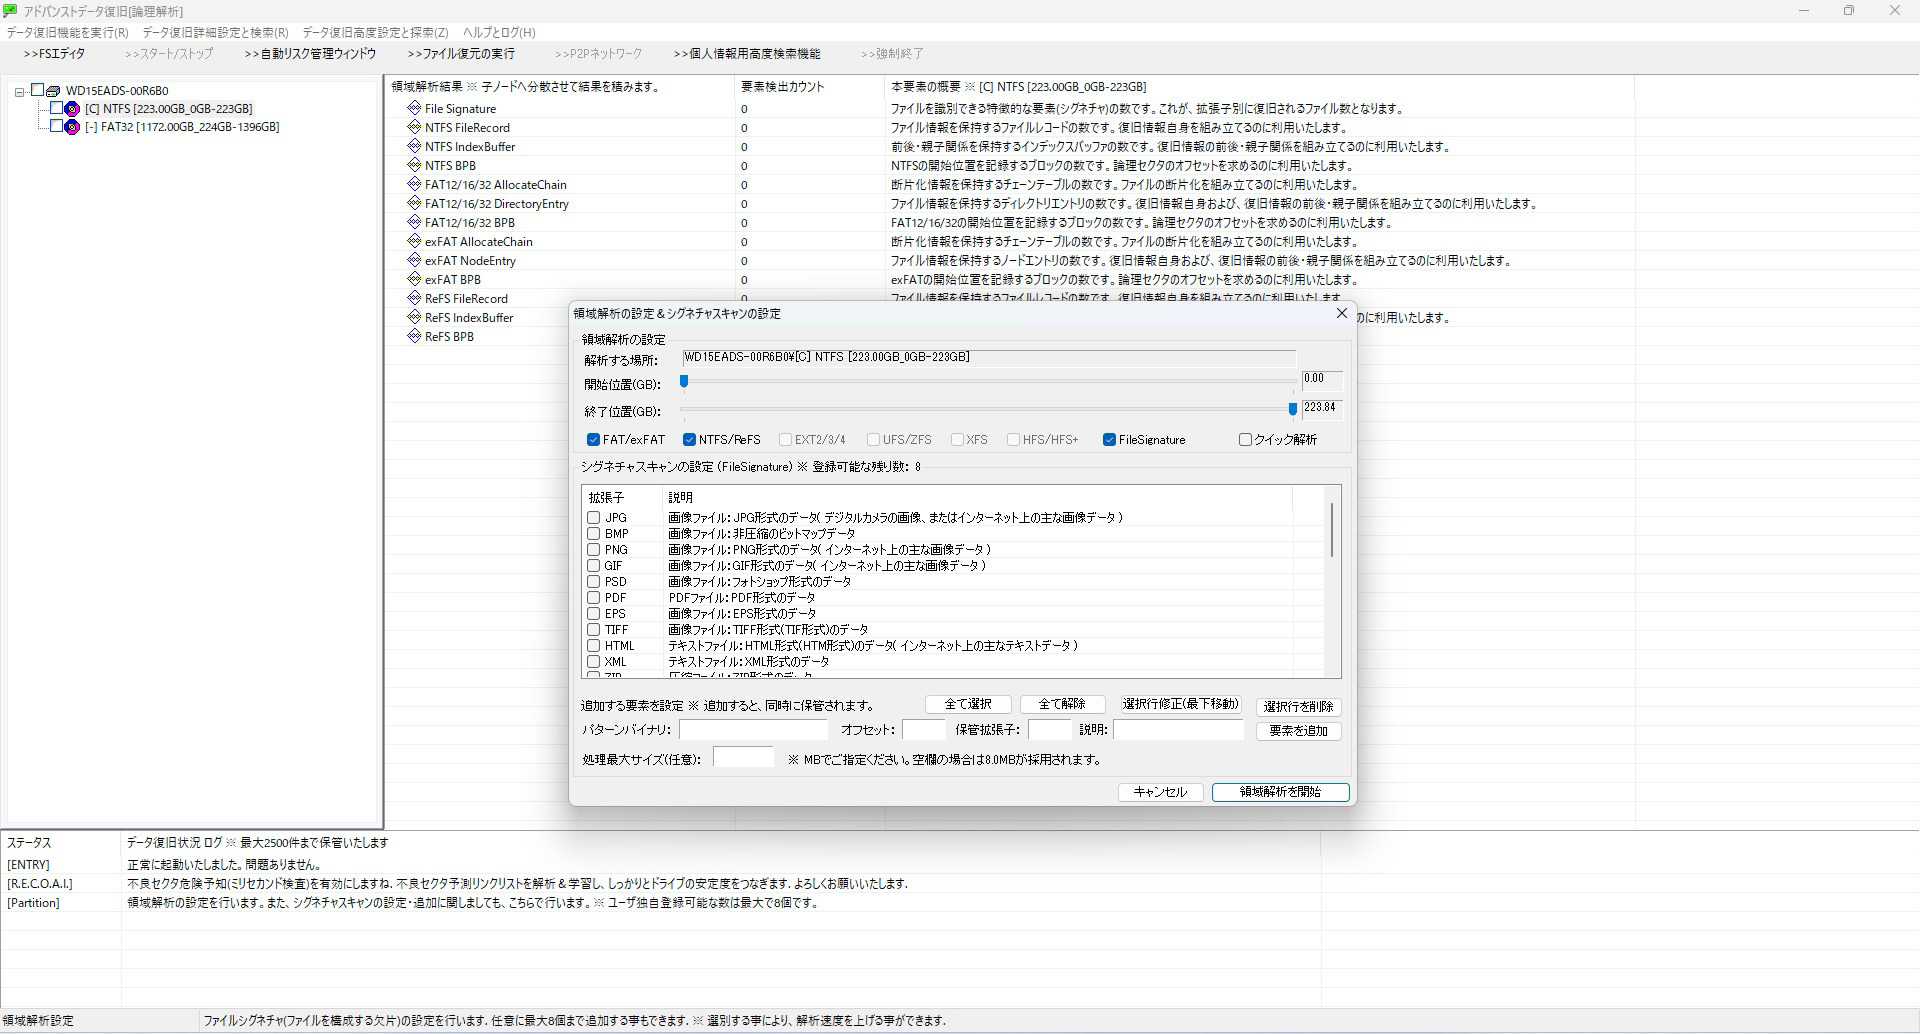
- 領域解析実行前に「クイック解析」にチェックを入れ解析時間を短縮。
- クイック解析は第一領域(先頭)に対して有効です。
- クイック完了後に表示される領域ノードを使って「ディレクトリ構造解析」し、復元を行います。
⑤ フォーマットしますか?表示からの復旧
- 同様に「詳細スキャン」→「領域解析」→「ディレクトリ構造解析」の順に実行。
⑥ 大量の不良セクタ(Bad Status)状態から復旧
- 不良セクタ危険予知を必ず有効にしてセクタの負荷を下げながら解析を進めます。
⑦ 認識が不安定なドライブからの復旧
- 認識が途切れる場合は先に「自動リスク管理ウィンドウ」で監視状態を作ってからスキャン。
⑧ ヘッド吸着・ドライブ落下からの復旧
- 初期診断段階で物理異常が確認された場合は領域解析に移る前にバックアップを確保してください。
⑨ SSD/NVMe 転送速度低下からの復旧
- 「不良セクタ危険予知」と「ディレクトリ構造解析」を併用してストレートにRootフォルダから復元します。