
目次 [INDEX]
RAID構成ドライブからの復旧手順
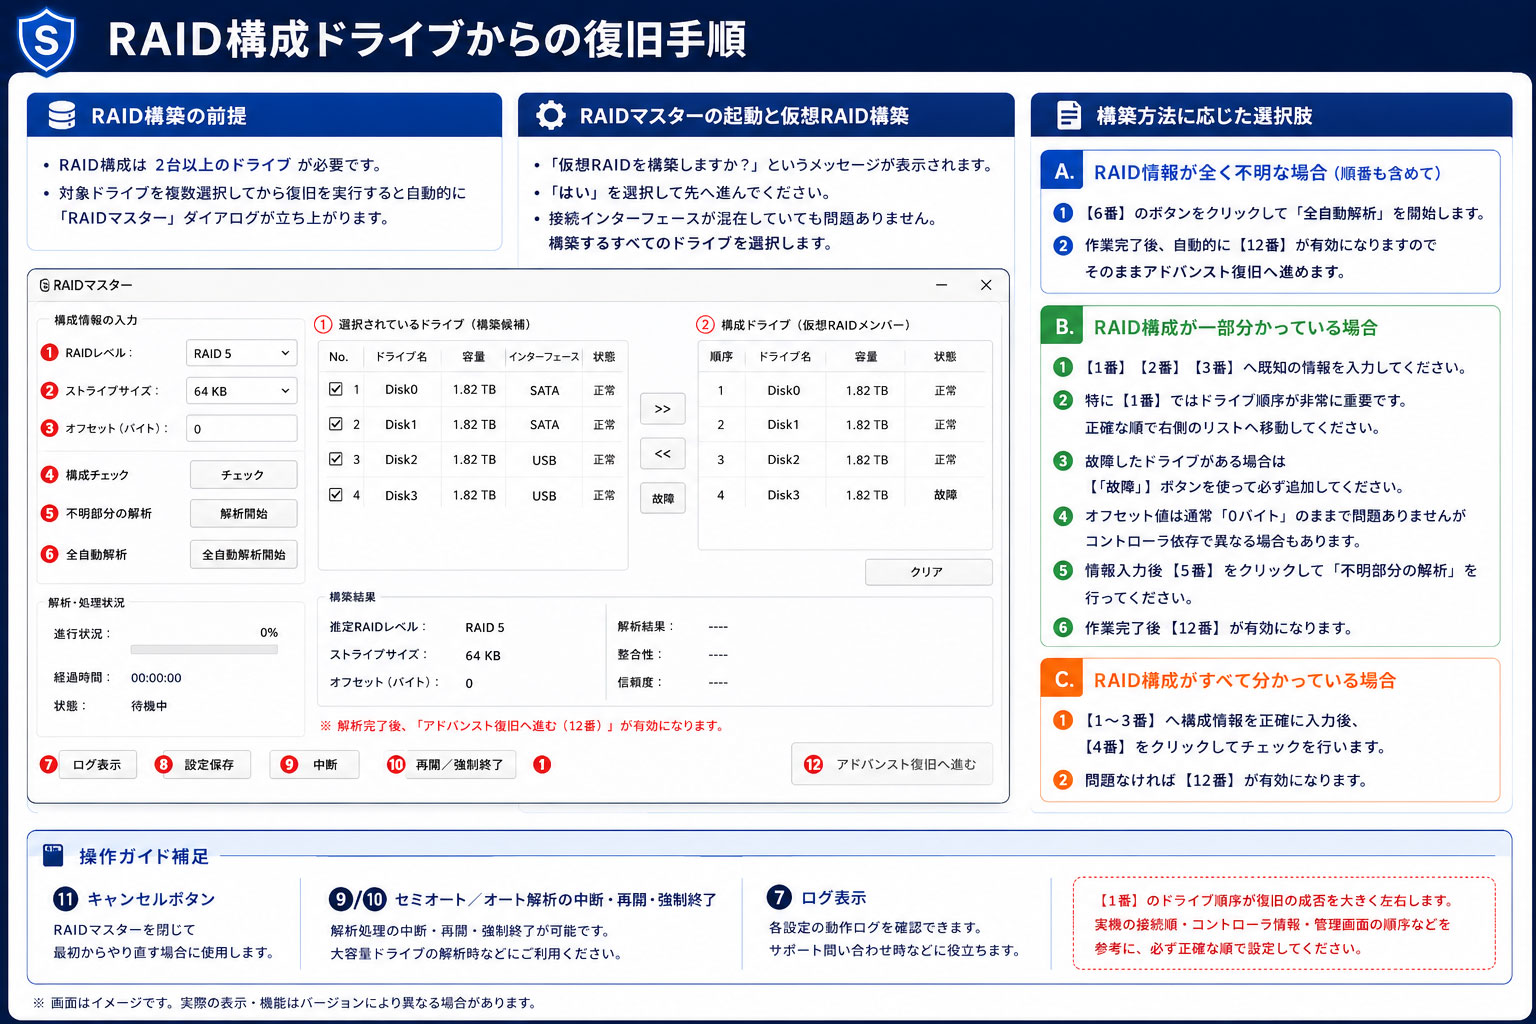
RAID構築の前提

- RAID構成は 2台以上のドライブ が必要です。
- 対象ドライブを複数選択してから復旧を実行すると自動的に「RAIDマスター」ダイアログが立ち上がります。
RAIDマスターの起動と仮想RAID構築
- 「仮想RAIDを構築しますか?」というメッセージが表示されます。
- 「はい」 を選択して先へ進んでください。
- 接続インターフェースが混在していても問題ありません。構築するすべてのドライブを選択します。
構築方法に応じた選択肢
A. RAID情報が全く不明な場合(順番も含めて)
- 【6番】のボタンをクリックして「全自動解析」を開始します。
- 作業完了後、自動的に【12番】が有効になりますのでそのままアドバンスト復旧へ進めます。
B. RAID構成が一部分かっている場合
- 【1番】【2番】【3番】へ既知の情報を入力してください。
- 特に【1番】ではドライブ順序が非常に重要です。正確な順で右側のリストへ移動してください。
- 故障したドライブがある場合は【「故障」】ボタンを使って必ず追加してください。
- オフセット値は通常「0バイト」のままで問題ありませんがコントローラ依存で異なる場合もあります。
- 情報入力後【5番】をクリックして「不明部分の解析」を行ってください。
- 作業完了後【12番】が有効になります。
C. RAID構成がすべて分かっている場合
- 【1〜3番】へ構成情報を正確に入力後、【4番】をクリックしてチェックを行います。
- 問題なければ【12番】が有効になります。
操作ガイド補足
- 【11番】キャンセルボタン:RAIDマスターを閉じて最初からやり直す場合に使用します。
- 【9番】【10番】:セミオート/オート解析の中断・再開・強制終了に対応しています。
- 【7番】:各設定の動作ログ確認用。サポート問い合わせ時などに役立ちます。