
目次 [INDEX]
- ドライブレストレーション 操作手順マニュアル
- 1. データ復旧対象のドライブを選択
- 2. S.M.A.R.T.ビューの表示
- 3. 事前検査の実行
- 4. 転送先ドライブの選択
- 5. ドライブレストレーションを開始
- 6. スキャン進行状況とレジューム機能
- 7. 検査・ログ関連
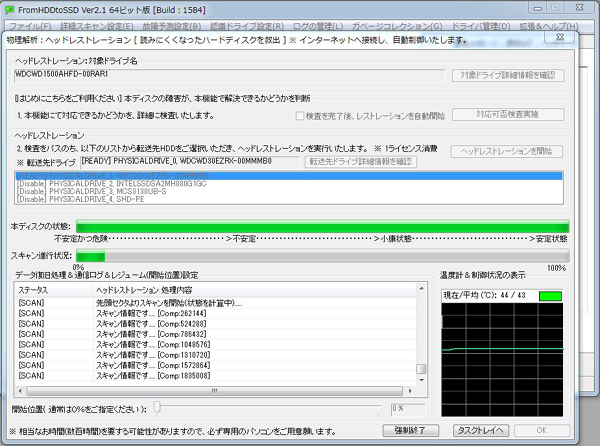
- 物理解析 (ドライブレストレーション)
- 操作方法1: 起動準備
- 操作方法2: 起動とドライブ昇格
- 操作方法3: 詳細情報でドライブ確認
- 操作方法4: 対応可否検査の実行
- 操作方法5: 実行
- 補足:表示内容について
- [A] 対象ドライブ名
- [B] 対応可否検査
- [C] レストレーションの開始
- [D] ディスク状態
- [E] スキャン進行状況
- [F] ログ
- [G] 温度・制御状況
- [H] 評価色とヘッド状態
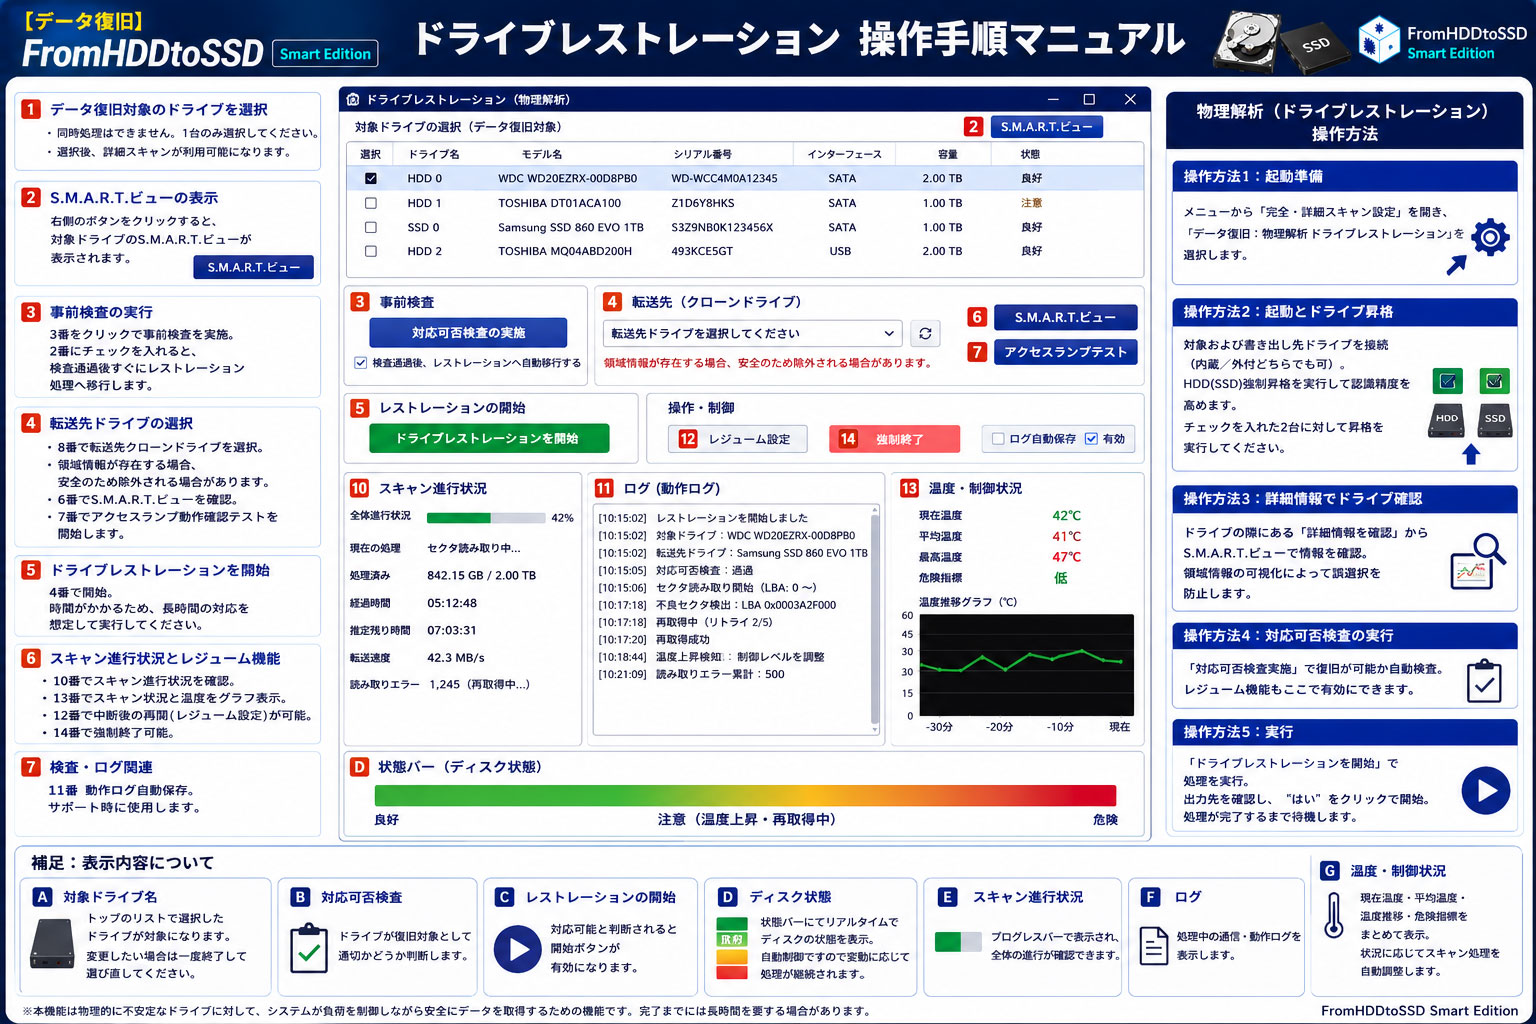
ドライブレストレーション 操作手順マニュアル
1. データ復旧対象のドライブを選択
- 同時処理はできません。1台のみ選択してください。
- 選択後、詳細スキャンが利用可能になります。
2. S.M.A.R.T.ビューの表示
- 右側のボタンをクリックすると、
対象ドライブのS.M.A.R.T.ビューが表示されます。
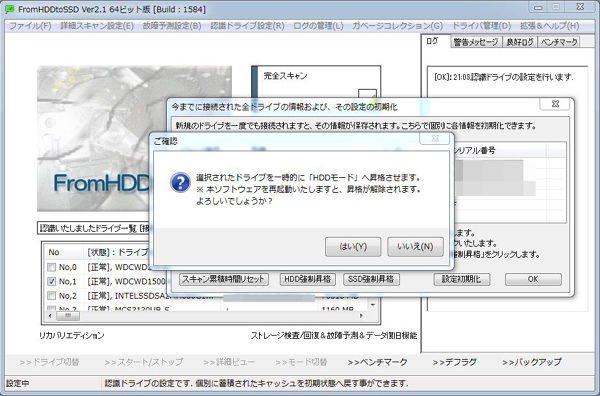
3. 事前検査の実行
- 3番をクリックで事前検査を実施。
- 2番にチェックを入れると、
検査通過後すぐにレストレーション処理へ移行します。
4. 転送先ドライブの選択
- 8番で転送先クローンドライブを選択。
- 領域情報が存在する場合、
安全のため除外される場合があります。 - 6番でS.M.A.R.T.ビューを確認。
- 7番でアクセスランプ動作確認テストを開始します。
5. ドライブレストレーションを開始
- 4番で開始。
- 時間がかかるため、
長時間の対応を想定して実行してください。
6. スキャン進行状況とレジューム機能
- 10番でスキャン進行状況を確認。
- 13番でスキャン状況と温度をグラフ表示。
- 12番で中断後の再開(レジューム設定)が可能。
- 14番で強制終了可能。
7. 検査・ログ関連
- 11番 動作ログ自動保存。
- サポート時に使用します。
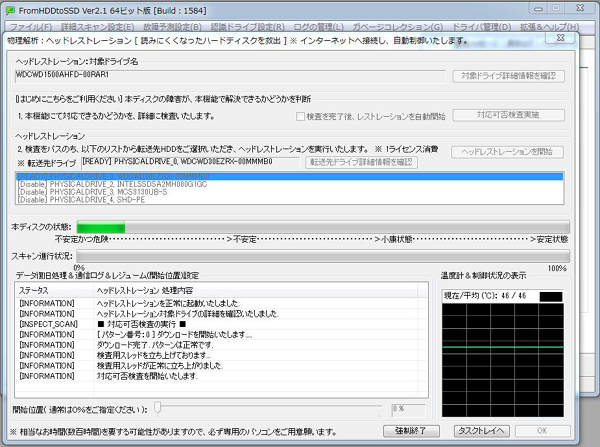
物理解析 (ドライブレストレーション)
操作方法1: 起動準備
- メニューから「完全・詳細スキャン設定」を開き、
「データ復旧: 物理解析 ドライブレストレーション」を選択します。
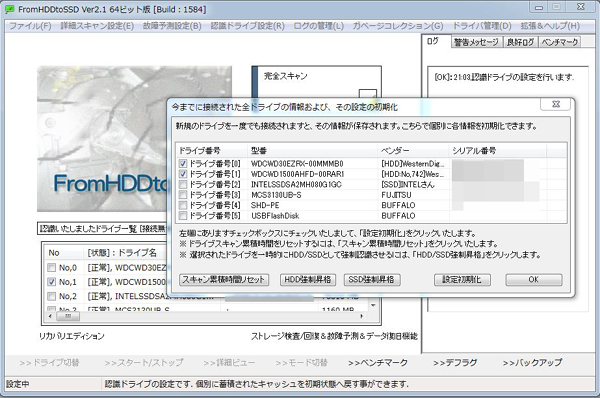
操作方法2: 起動とドライブ昇格
- 対象および書き出し先ドライブを接続(内蔵/外付どちらでも可)。
- HDD(SSD)強制昇格を実行して認識精度を高めます。
- チェックを入れた2台に対して昇格を実行してください。
操作方法3: 詳細情報でドライブ確認
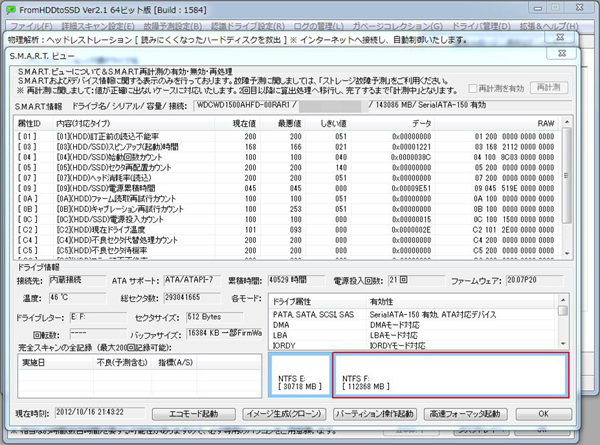
- ドライブの隣にある「詳細情報を確認」からS.M.A.R.T.ビューで情報を確認。
- 領域情報の可視化によって誤選択を防止します。
操作方法4: 対応可否検査の実行
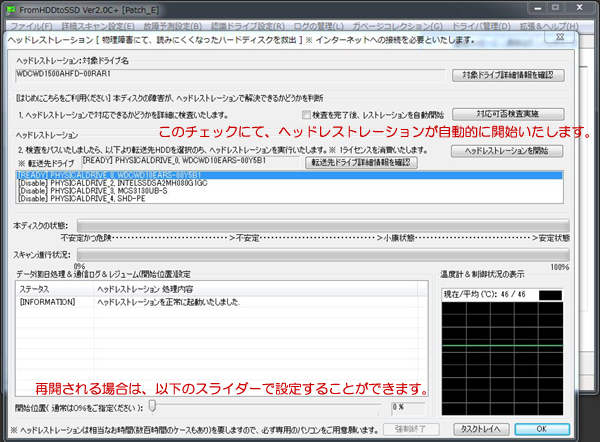
- 「対応可否検査実施」で復旧が可能か自動検査。
- レジューム機能もここで有効にできます。
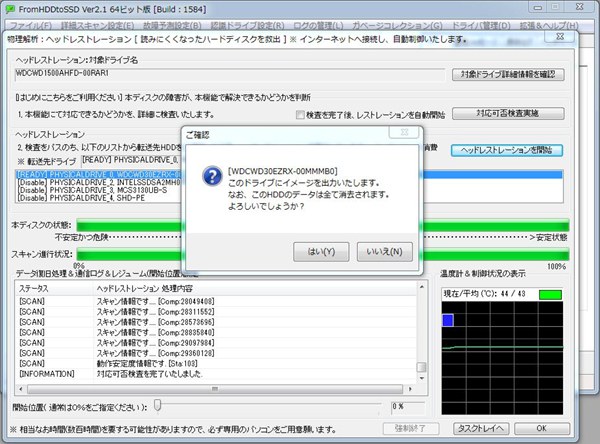
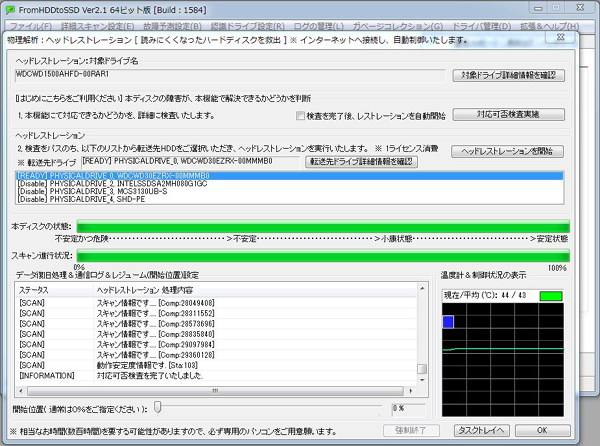
操作方法5: 実行
- 「ドライブレストレーションを開始」で処理を実行。
- 出力先を確認し、”はい” をクリックで開始。
- 処理が完了するまで待機します。
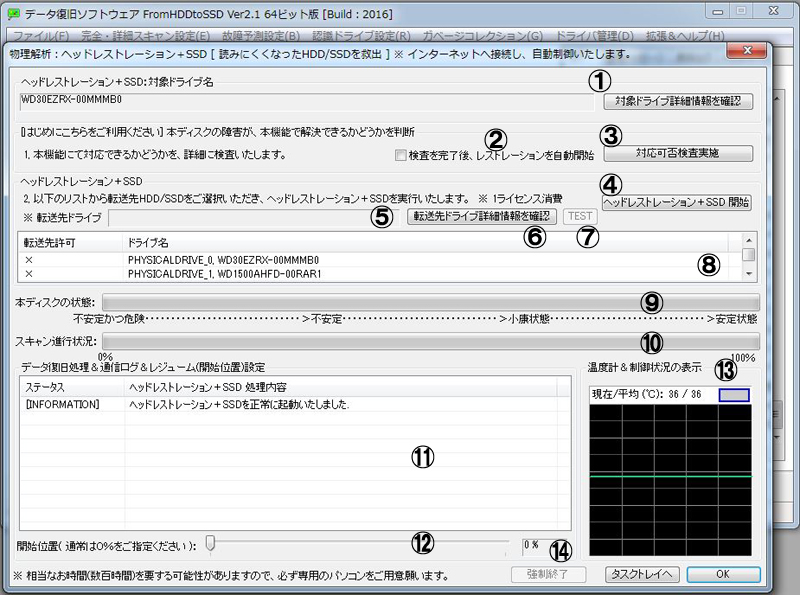
補足:表示内容について
[A] 対象ドライブ名
- トップのリストで選択したドライブが対象になります。
- 変更したい場合は一度終了して選び直してください。
[B] 対応可否検査
- ドライブが復旧対象として適切かどうか判断します。
[C] レストレーションの開始
- 対応可能と判断されると開始ボタンが有効になります。
[D] ディスク状態
- 状態バーにてリアルタイムでディスクの状態を表示。
- 自動制御ですので変動に応じて処理が継続されます。
[E] スキャン進行状況
- プログレスバーで表示され、全体の進行が確認できます。
[F] ログ
- 処理中の通信・動作ログを表示します。
[G] 温度・制御状況
- 現在温度・平均温度・温度推移・危険指標をまとめて表示。
- 状況に応じてスキャン処理を自動調整します。
[H] 評価色とヘッド状態
- 緑:復旧率ほぼ100%
- 黄色:再スキャンあり
- 赤・白:一部エラーや再スキャン対象
- 白バー:再スキャン要求セクタを表します