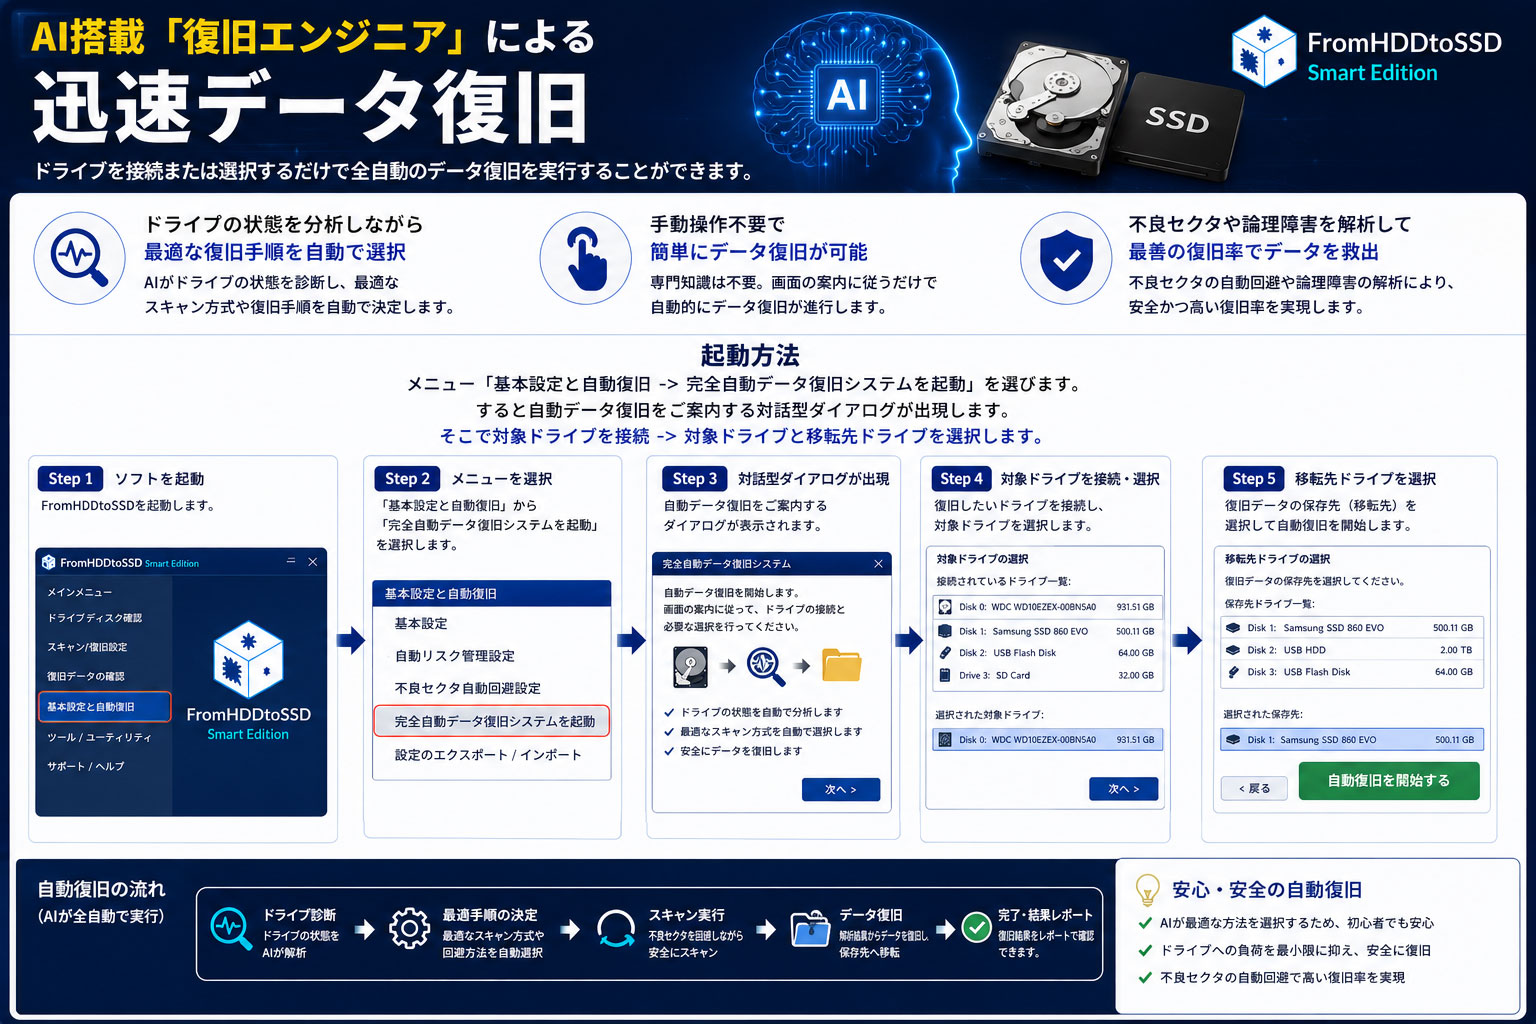
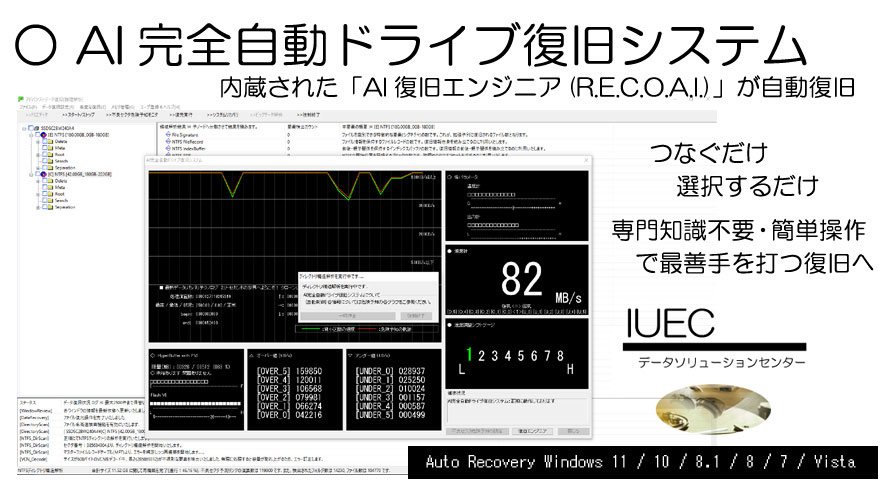
■ 壊れた復旧対象と、データの移転先をつなぐだけ あとは自動でお任せ データ復旧が完了いたします。
All you connect between the damaged recovery target and the data transfer destination, then data recovery will be completed automatically.
起動後、つなぐか選ぶかして、あとは待つだけ。おしまいじゃ(^^;
Hey, Alice. Oh ... It seems that you are disappointed your drive broke and lost data. haha ... let's anything rely on me!
・・・・・。まさか、これで操作方法は終わり?
What's wrong, Bob? It is already over. Data recovery and relationships with you.
そうじゃな。別にコツとかもない。これが「完全自動」のメリットなのか、それともデメリットなのか・・
What? That's very strange. Alice ... you vulnerable to machines. Won't you want to rely on me so much?
・・・・・。こうすれば、よくデータが取れるとか・・?そういうのもない?
It's all over. All, All, All! You are persistent!
安全に沢山取れそうな場所を自動選別してから復旧じゃよ。あえて強制終了も封じたからな。完全な自動復旧。
Why? Why has Alice data been recovered ... ! It shouldn't be possible for Alice. What?
there is a tool that can be data recovered so easily ... oh ...
■ データを安全に沢山取れる場所を自動選別、そこから復旧を開始するアルゴリズムです
It is an algorithm that automatically selects a place where a lot of data can be safely taken and starts recovery from there.
データ復旧サービスで培った「壊れかけドライブの安全エリア判断」ならびに、
「安全に沢山復旧できる各フォルダの選別」などの独自アルゴリズムを搭載しております。
これにより、ゆっくりと何週もするような感じで各データを自動復旧いたします。
This feature is equipped with original algorithms such as "determination of the safe area of a broken drive"
cultivated in the data recovery service and "selection of each folder that can be safely recovered in large numbers".
As a result, each data will be automatically restored as if it were handling in data recovery company.
※ この性質上、ピンポイントの処理で、ファイル名をご指定いただくことはできません。
その場合はこちらの手法で再構築を行い、
そのファイルのみを選択、復旧する手法でご対応をお願いいたします。
Due to this nature, you cannot specify the file name in pinpoint processing.
In that case, please rebuild using this method,
select only that file, and restore.
上部メニューより「ファイル」「AI完全自動ドライブ復旧システム」をご選択いただき、
後は指示通りに操作するだけで、データの復旧が開始いたします。
You select "File" and "AI fully automatic drive recovery system" from the top menu, and then just follow the instructions to start data recovery.
復旧の「コツ」とかに結果が左右されません。内蔵されたAI復旧エンジニアが最善手を目指して処理します。
ただし、R.E.C.O.A.I.の判断モードが唯一のコツかもしれません・・弱気・中立・強気を切り替えることができます。
デフォルトは弱気設定です。何も設定されない場合はこの弱気で動作いたしますので、そのまま完了までお待ちください。
The result does not depend in circumstance. The built-in AI recovery engineer will do the best for you.
However, the R.E.C.O.A.I. judgment mode may be the only trick ...
You can switch between bearish, neutral, and bullish. The default is a bearish setting.
If nothing is set, it will operate with this bearishness, so please wait until it is completed.
メニュー「ファイル」の中にある[デモ版]機能については、
復旧されたデータの書き出し以外について、ライセンス不要で、同じ動作をいたします。ご購入前の検証等に、是非ご利用ください。
The [Demo version] feature in the menu "File" does not require a license except for exporting the recovered data,
and the same operation is performed. Please use for verification before purchase.
各ドライブをつないで、選ぶだけです。
All you have to do is connect each drive and select.
接続ドライブのご確認後、ライセンスを確認いたします。
After confirming the connected drive, it will confirm the license.
あとは待つだけです。
※ 自動データ復旧の動作の様子を、動画にいたしました。
After, All you have to do ... only is wait.
* We made a video of the running of automatic data recovery.
そして……完了、お疲れさまです。
It's completed in processing.
自動復旧を完了いたしますと、移転先をご指定いただきましたドライブに「!Recovery」という名前のフォルダが生成いたします。
このフォルダに、復旧いたしました各データが格納されます。なにとぞよろしくお願いいたします。
When the automatic recovery is completed, a folder named "!Recovery" will be created on the drive for which
you have specified the relocation destination. Each recovered data is stored in this folder.