目次 [INDEX]
領域解析を活用したデータ復旧手順
1. アドバンストデータ復旧の起動
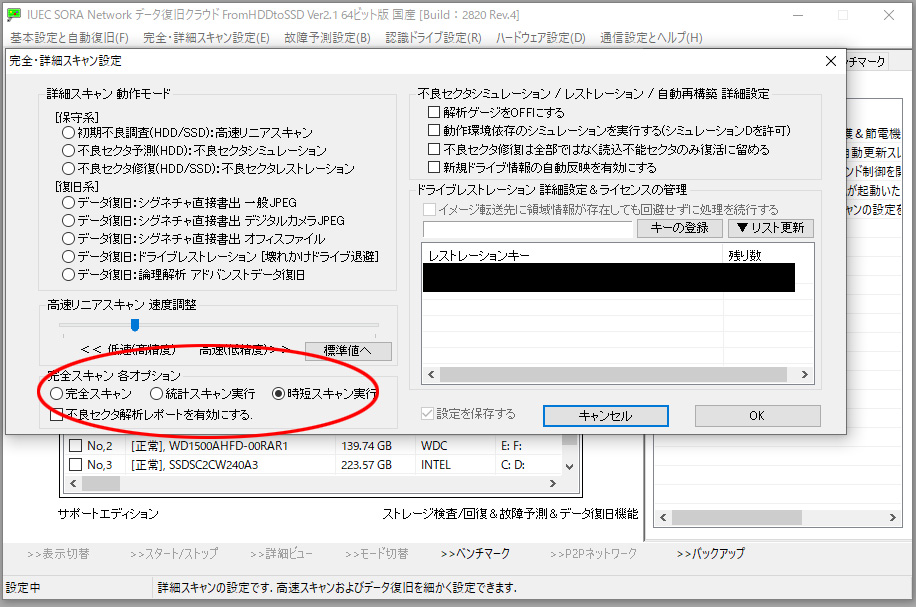
メニューの「完全・詳細スキャン設定」から「データ復旧:論理解析 アドバンストデータ復旧」を選択します。次に、対象ドライブをリストから選択し2番の「詳細スキャン」をクリックします。
2. 領域解析の開始
左側のドライブノード(ドライブ名)を右クリックし「領域解析」を起動します。
3. 領域解析の各設定項目
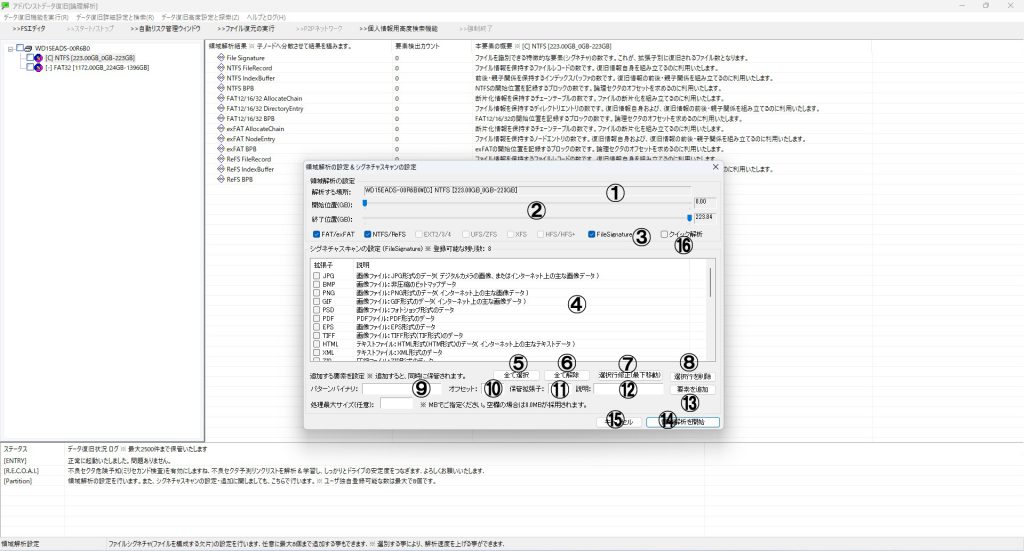
- 1番: ドライブまたは任意の領域に対して解析を実施します。
- 2番: スライダーで解析範囲を絞ることが可能です。
- 3番: 領域解析に使用するファイルシステムを指定します。
- 4番: 拡張子別復旧を有効にすることでデータ部分のみを直接抽出可能になります。
- 5〜6番: 拡張子別復旧の全選択・全解除ボタン。
- 7〜13番: 復旧対象の拡張子やシグネチャを手動で登録・削除可能です。
- 14番: 領域解析を開始します。
- 15番: 領域解析をキャンセルしメインウィンドウへ戻ります。
- 16番: 「クイック解析」を有効化することで解析時間を10秒以下に短縮できます。
4. 領域解析後の処理
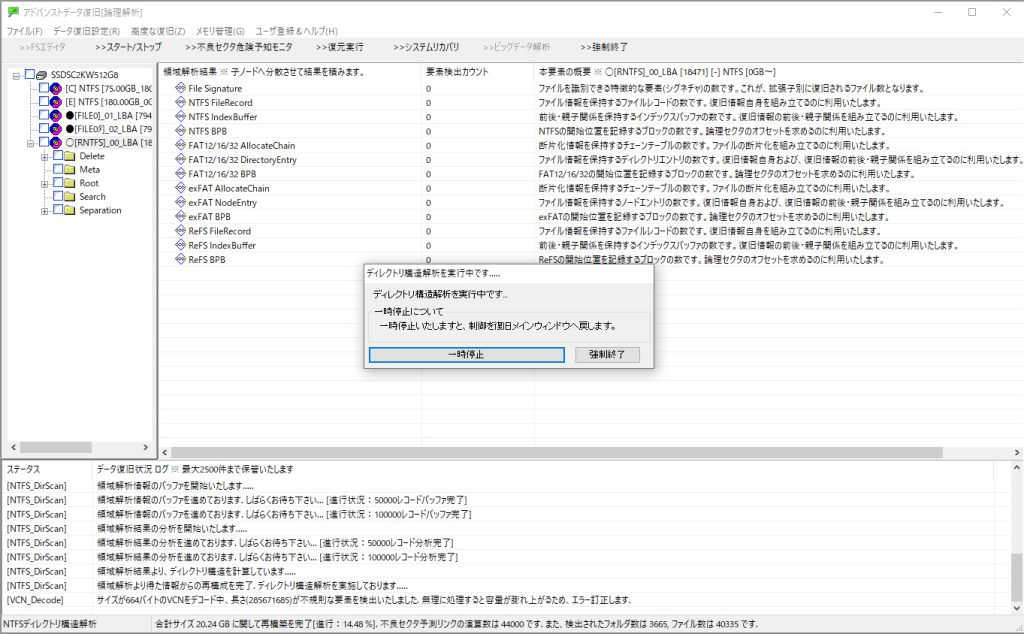
解析完了後「領域ノード」が多数表示されます。
精度の高いノードを選択のち右クリックで「ディレクトリ構造解析」を実行します。メッセージ「領域解析による解析情報が存在します……」が表示されたら「はい」をクリックしてください。
5. 領域ノードの精度と見分け方
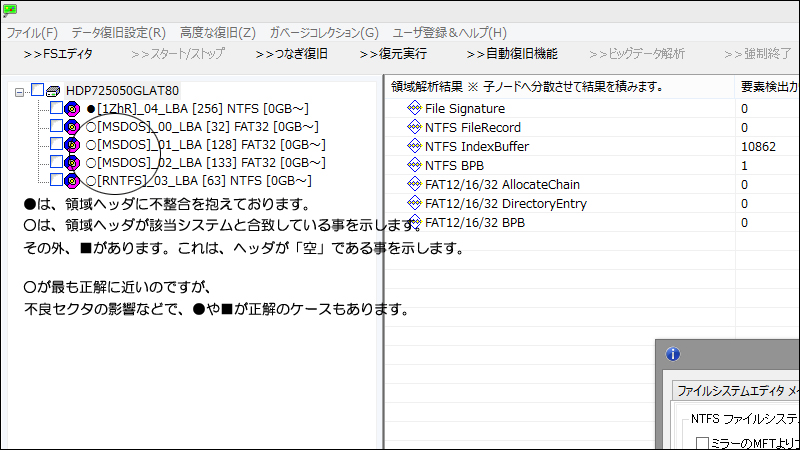
- 既存の領域ノード: ドライブに元々存在していた領域情報。
- 解析後の領域ノード: 領域解析によって得られた新しい情報。LBA(絶対セクタ)位置と、先頭「~」で表示されます。
シグネチャ(RNTFS、MSDOSなど)によって領域の開始位置(BPB)を特定できます。
6. 復旧対象ファイルの確認と復元
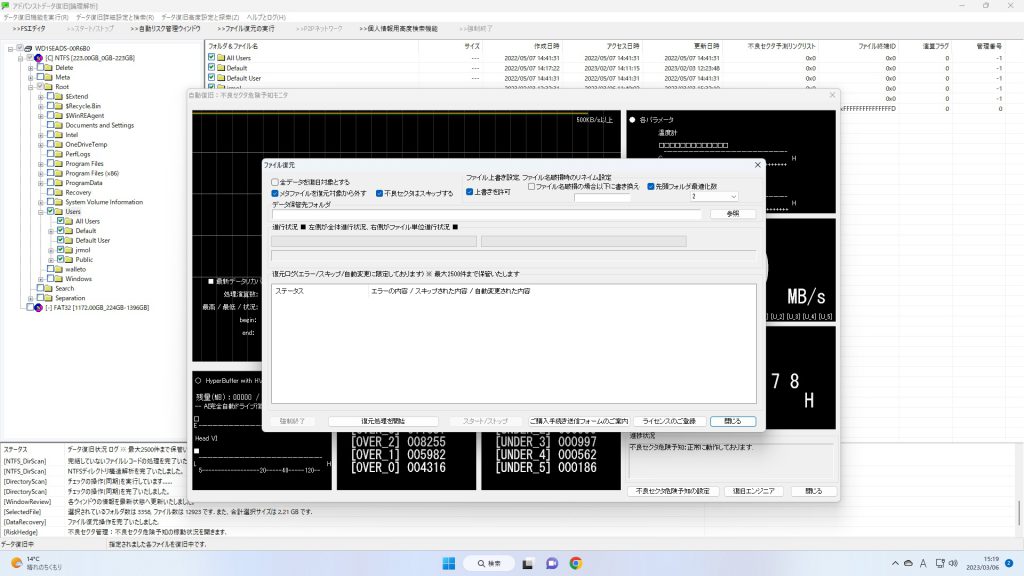
左側ツリーを展開して「Rootフォルダ」を開き復旧可能なファイル・フォルダを確認します。そして必要なデータにチェックを入れ「ファイル復元」を実行することで書き出します。