
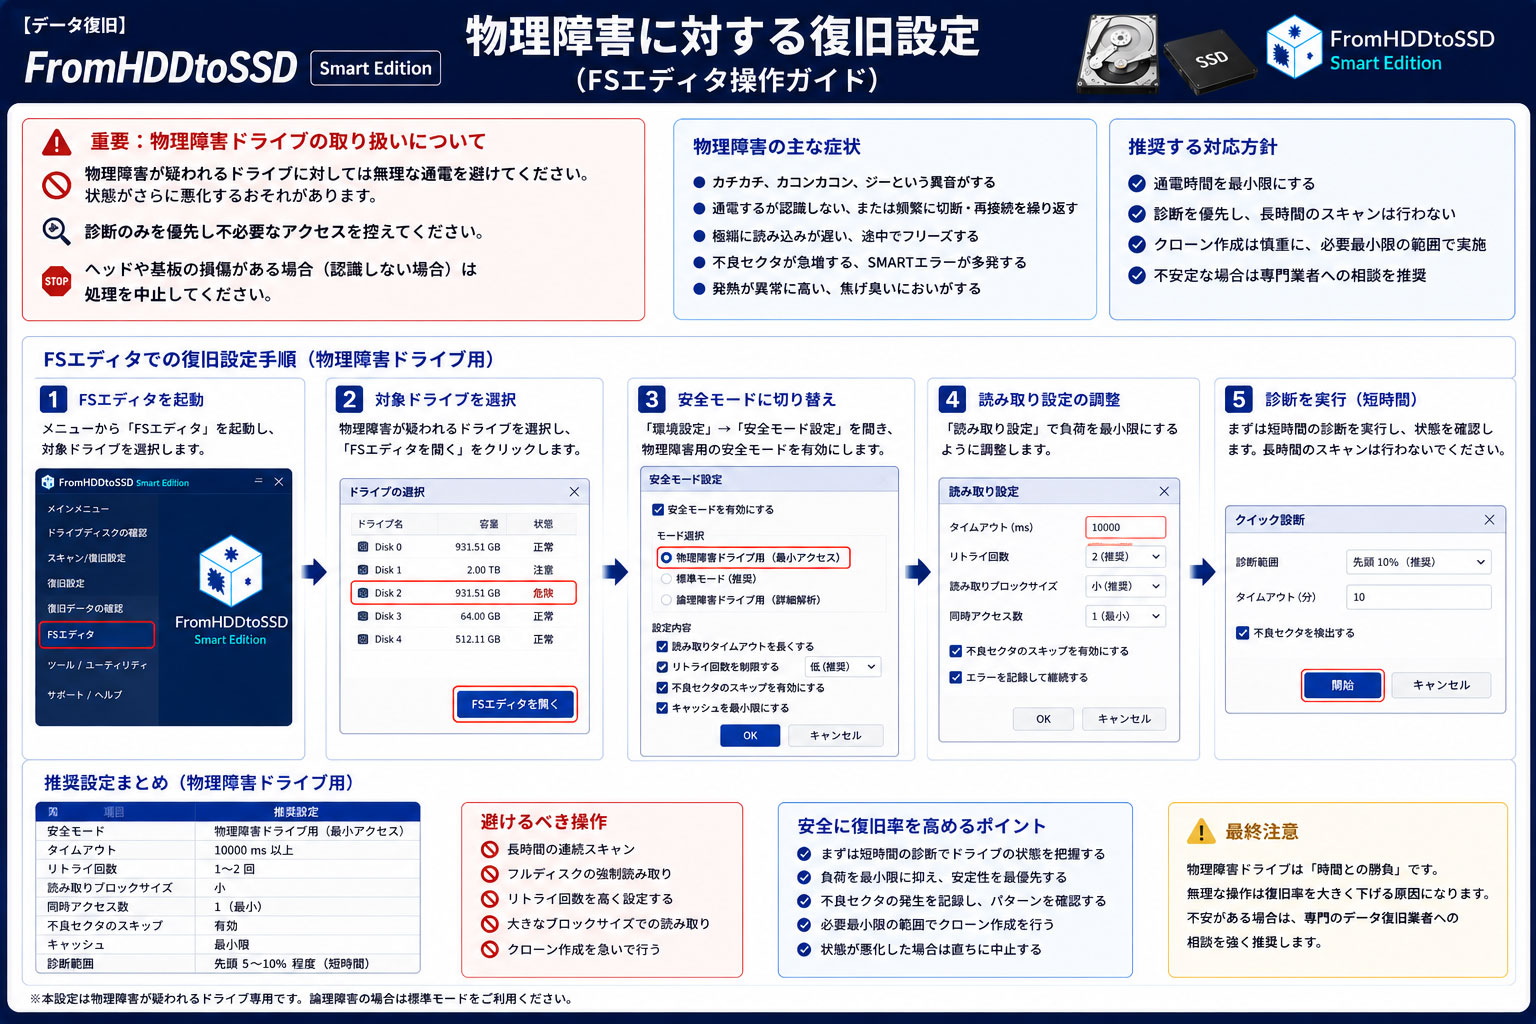
物理障害に対する復旧設定(FSエディタ操作ガイド)
■ 重要:物理障害ドライブの取り扱いについて
物理障害が疑われるドライブに対しては無理な通電を避けてください。状態がさらに悪化するおそれがあります。
- 診断のみを優先し不必要なアクセスを控えてください。
- ヘッドや基板の損傷がある場合(認識しない場合)は処理を中止してください。
■ 復旧手順(論理解析:アドバンスト復旧モード)
1. ソフト起動とFSエディタへの移動
FromHDDtoSSDを起動し、対象ドライブを選択後、画面上部の「>>FSエディタ」 をクリックします。
2. 論理解析モードの設定
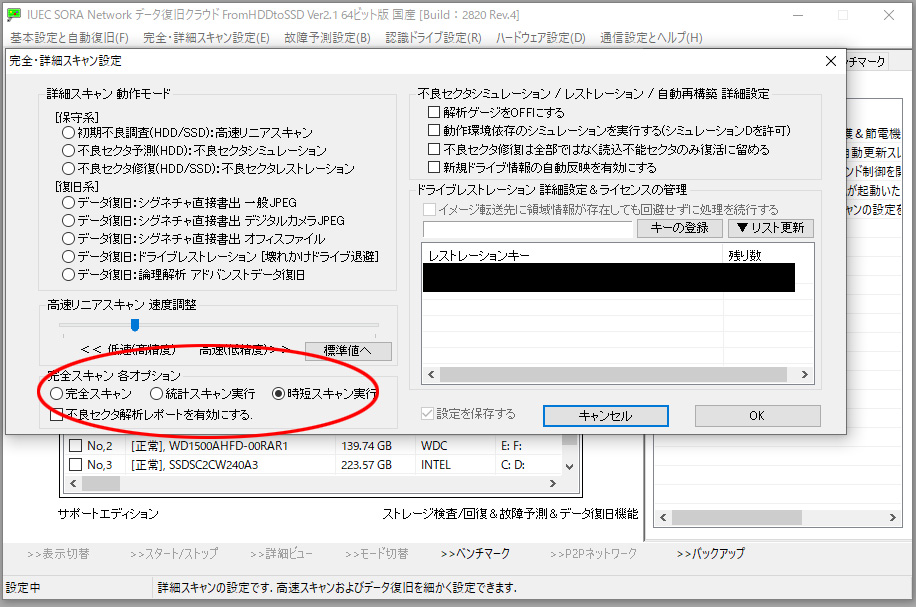
メニューより「完全・詳細スキャン設定」→「データ復旧:論理解析 アドバンストデータ復旧」 を選択します。対象ドライブをリストから選び、2番の「詳細スキャン」をクリックします。
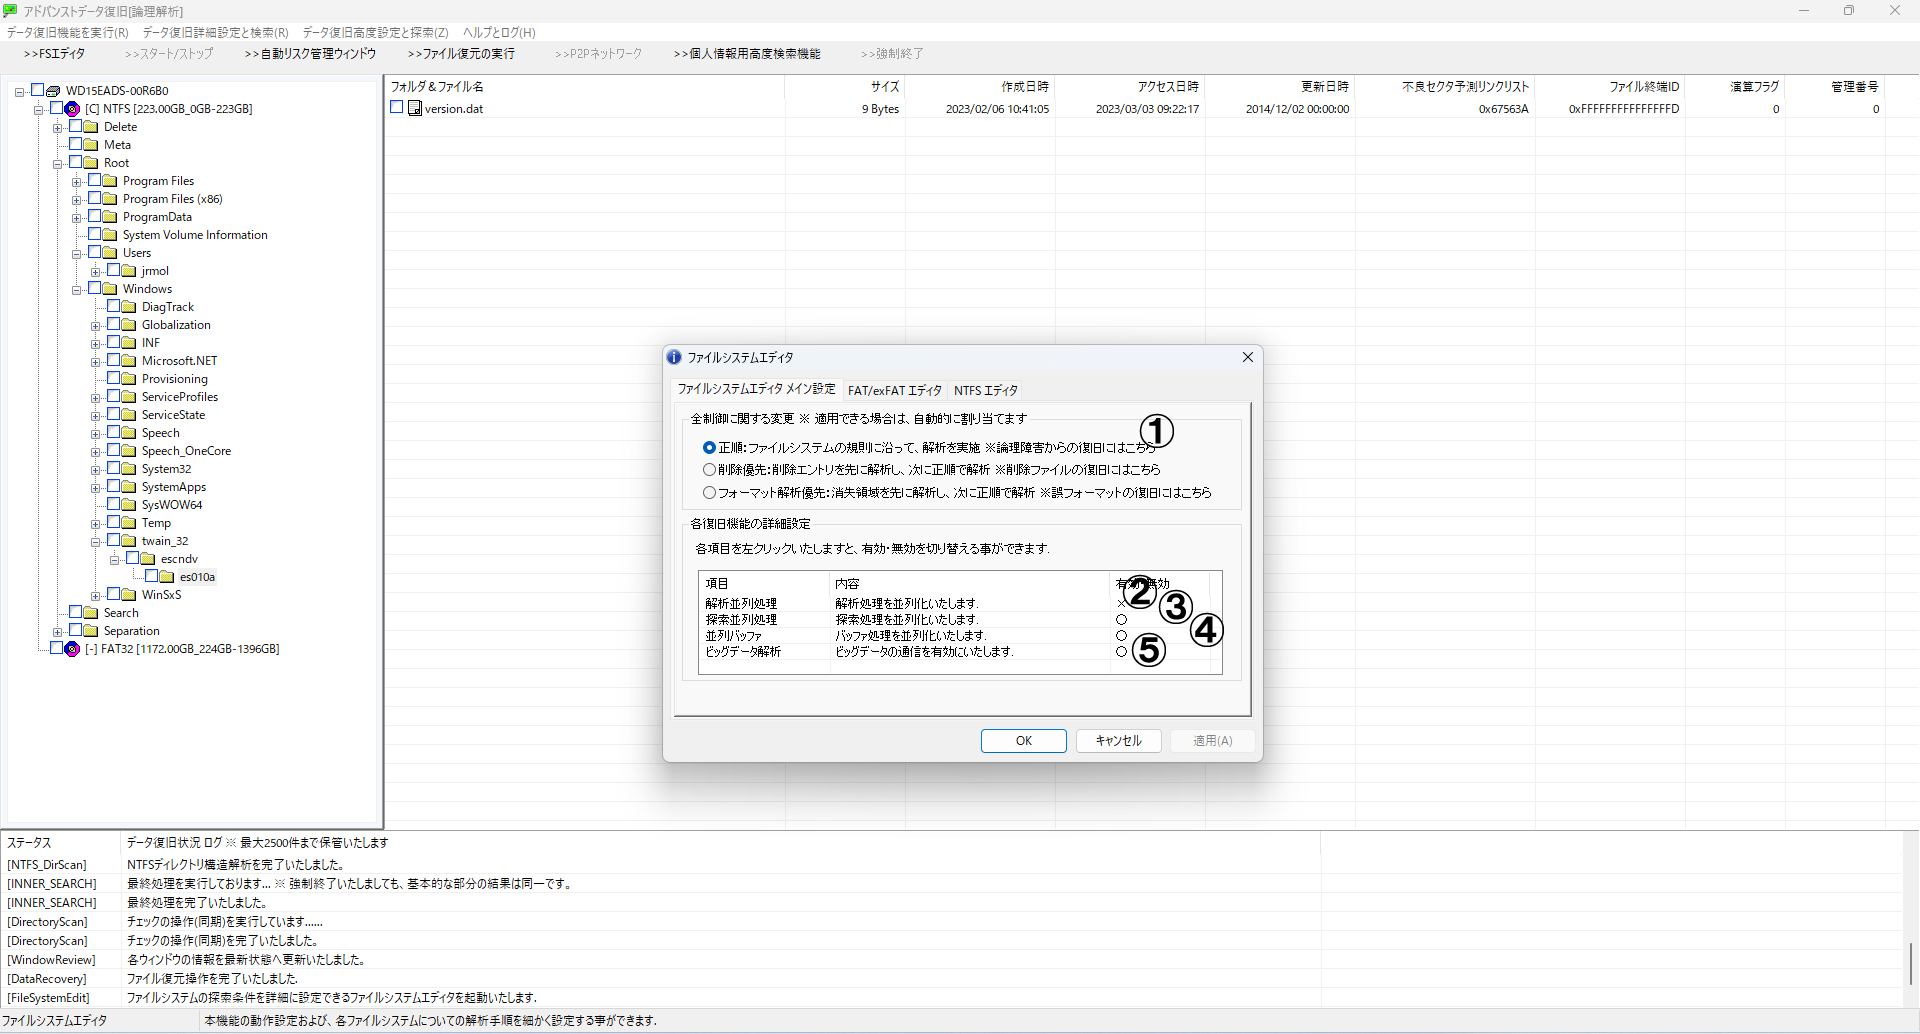
FSエディタでの構成別設定
正順設定(全体共通)
FSエディタが立ち上がったら、「1番目の正順」を選択し「適用」→「OK」をクリックします。
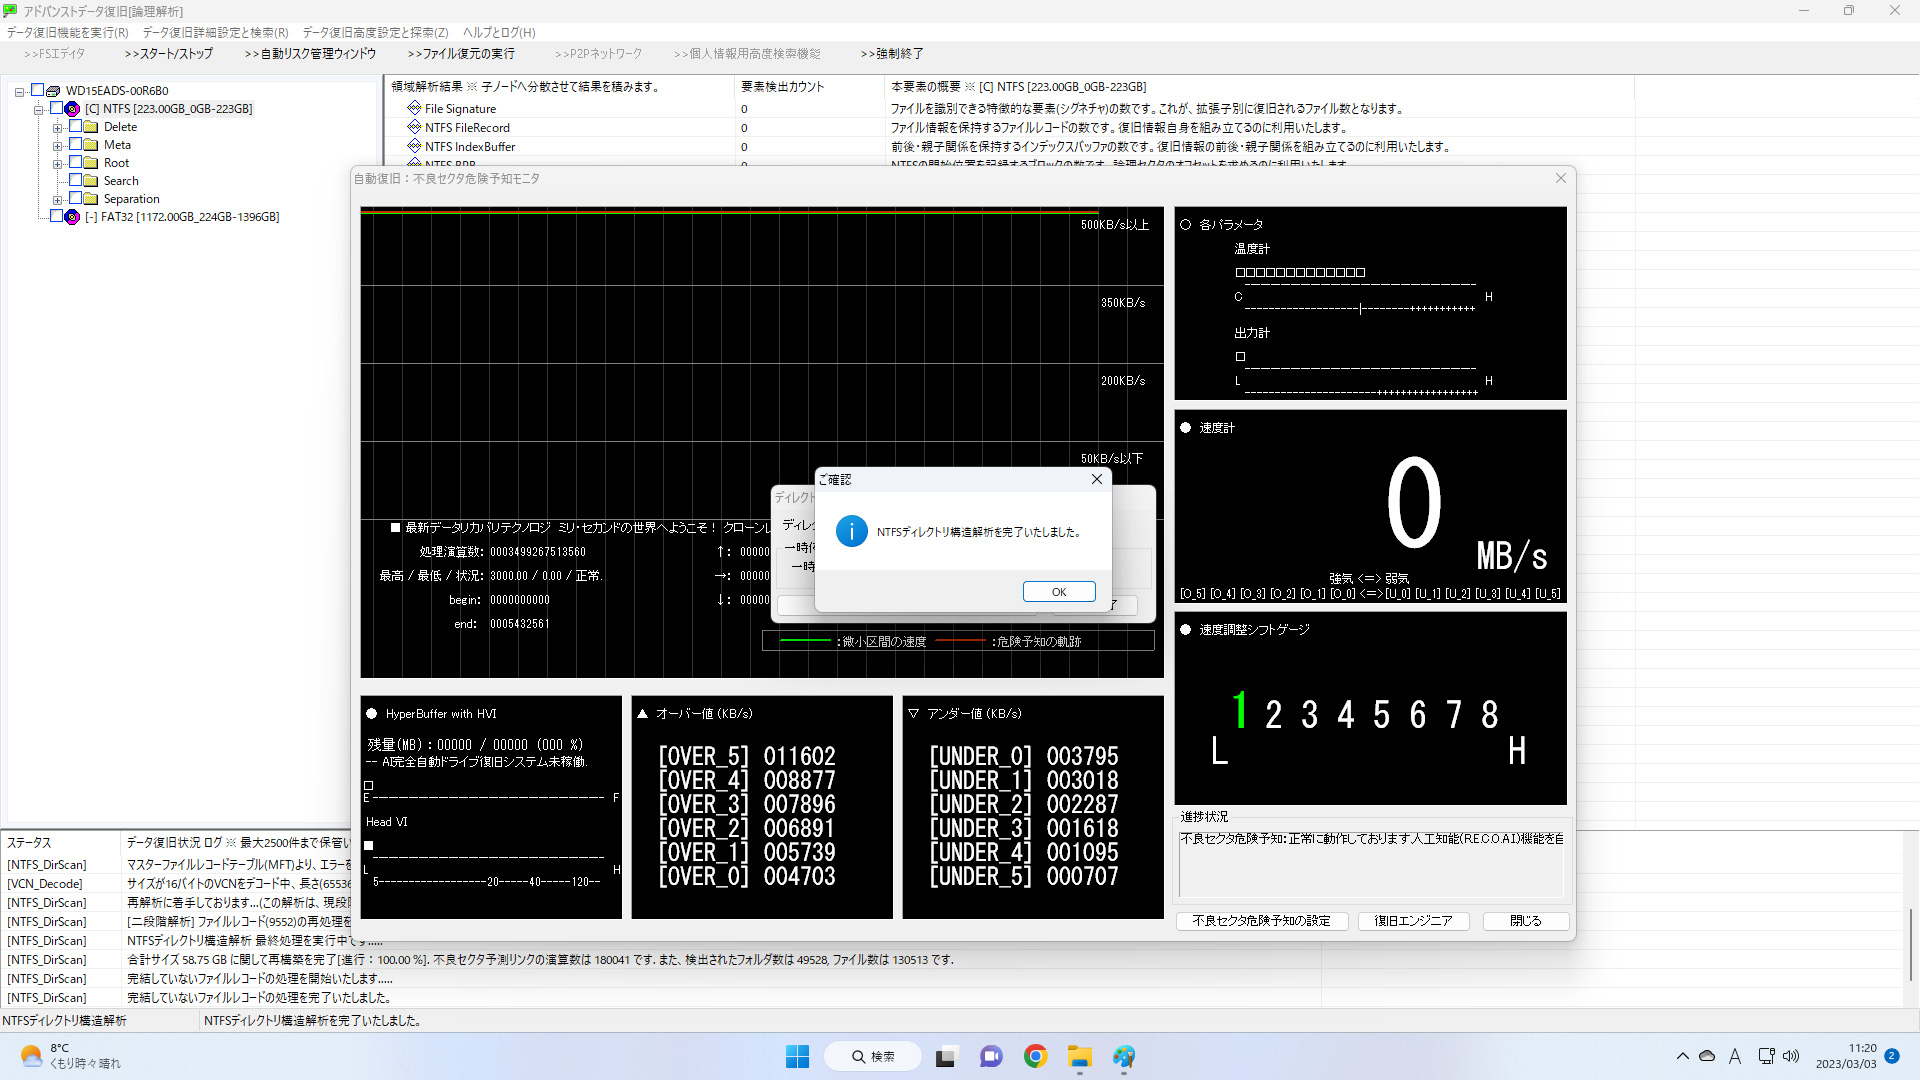
ミリセカンド検査(必須)
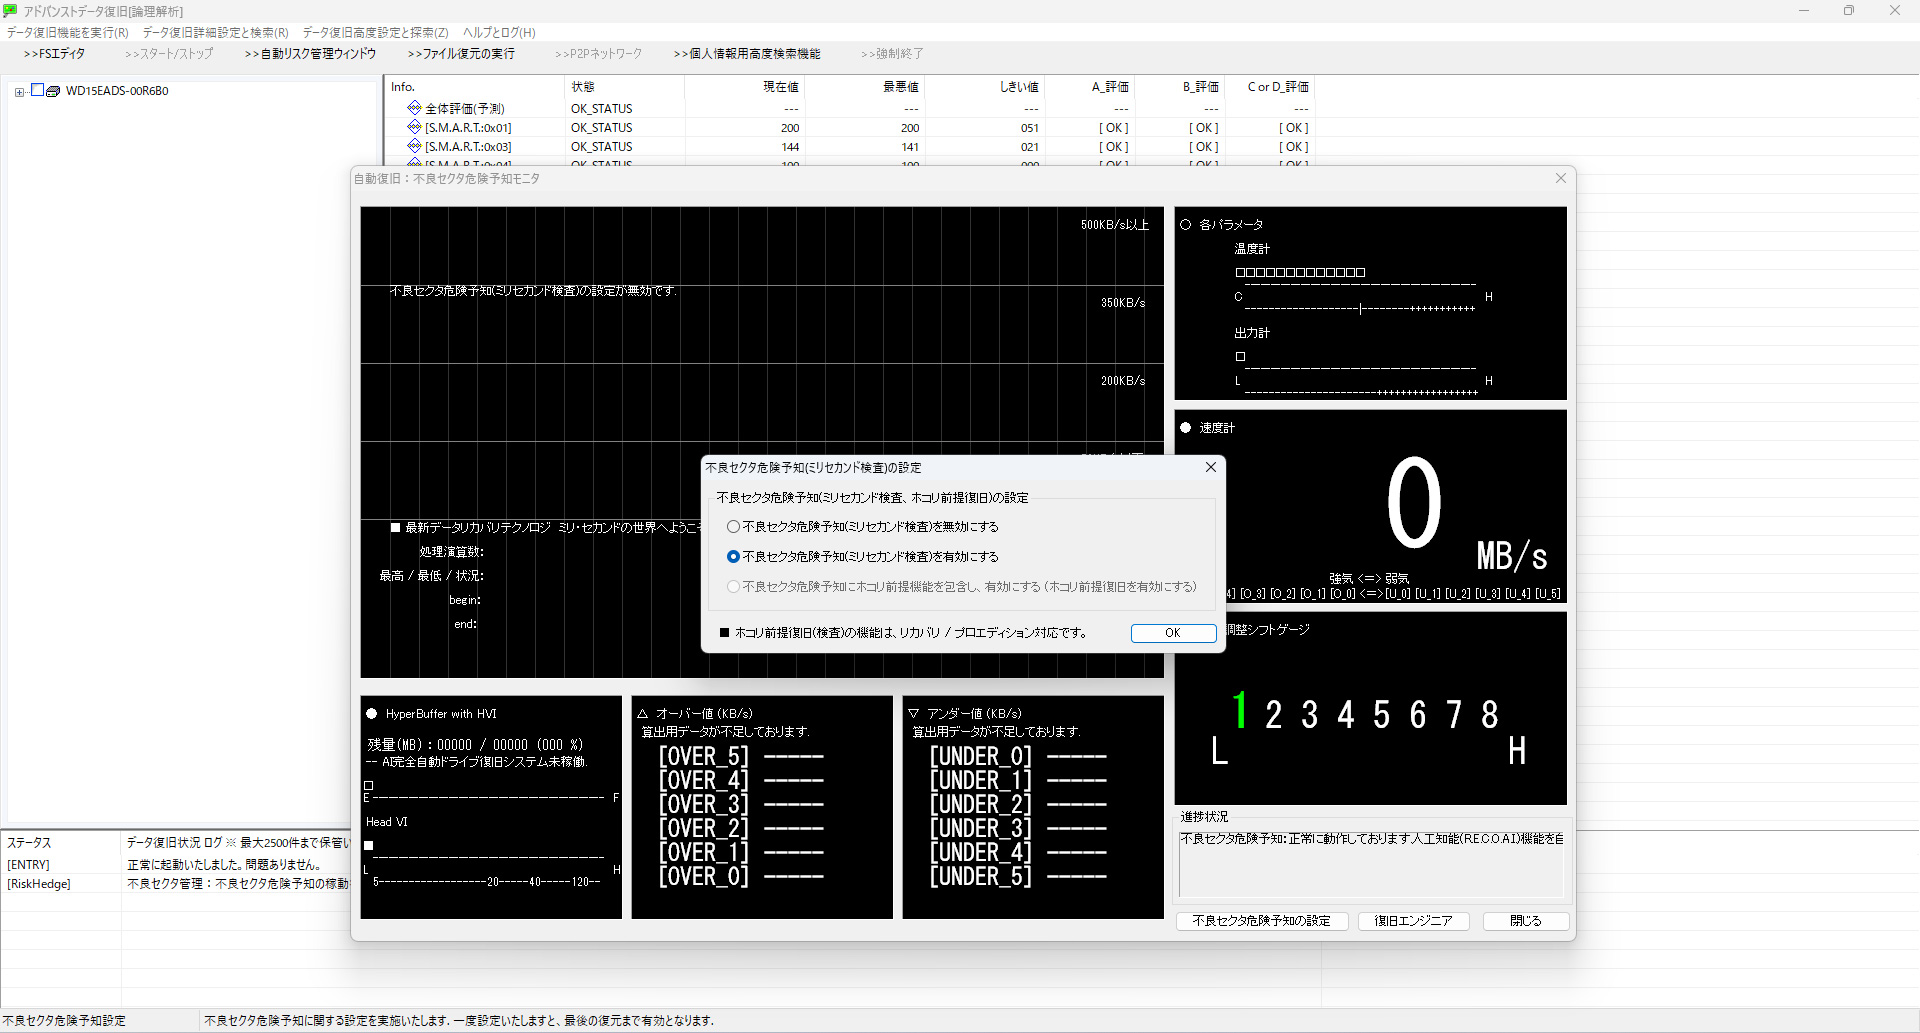
「不良セクタ危険予知(ミリセカンド検査)」 を必ず有効にしてください。これは障害予知に基づいたスキャン精度向上機能です。
FAT / exFAT の場合
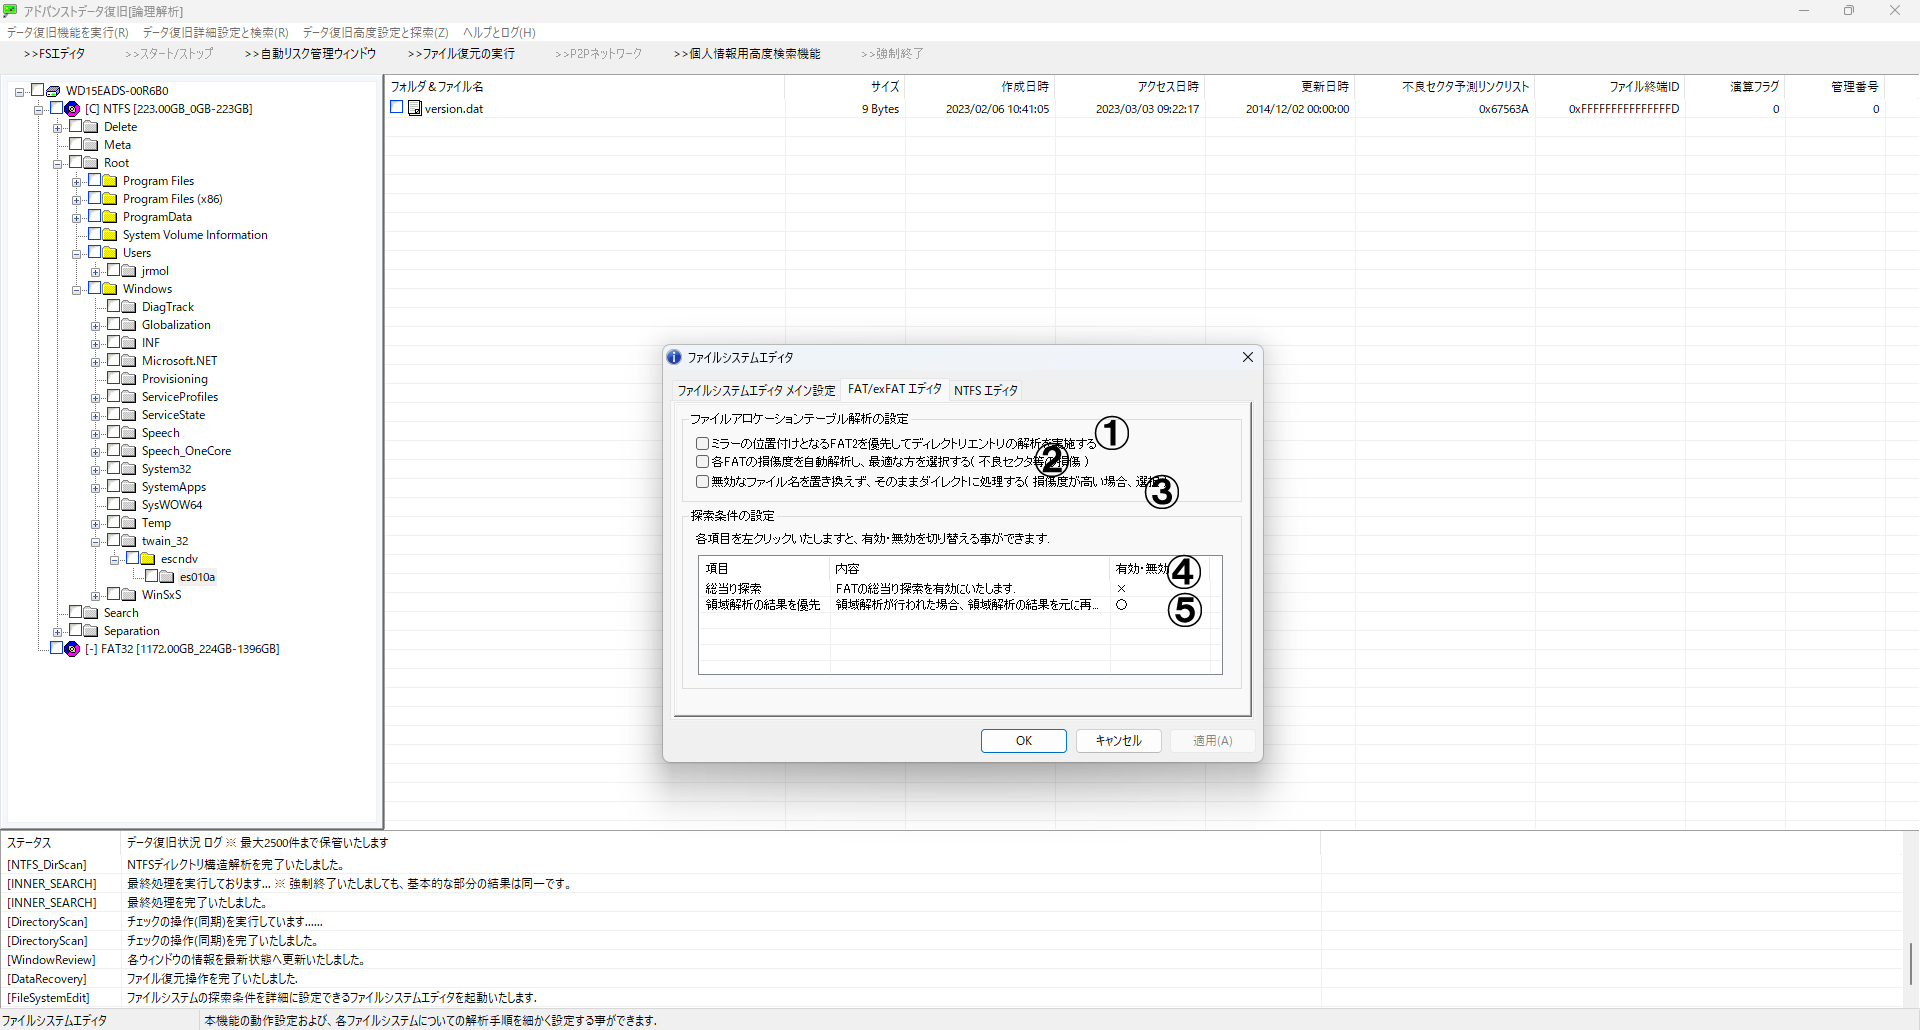
- 「FAT/exFAT エディタ」を開きます。
- 「2番目」「3番目」 の項目にチェックを入れ「適用」→「OK」をクリックします。
NTFS の場合
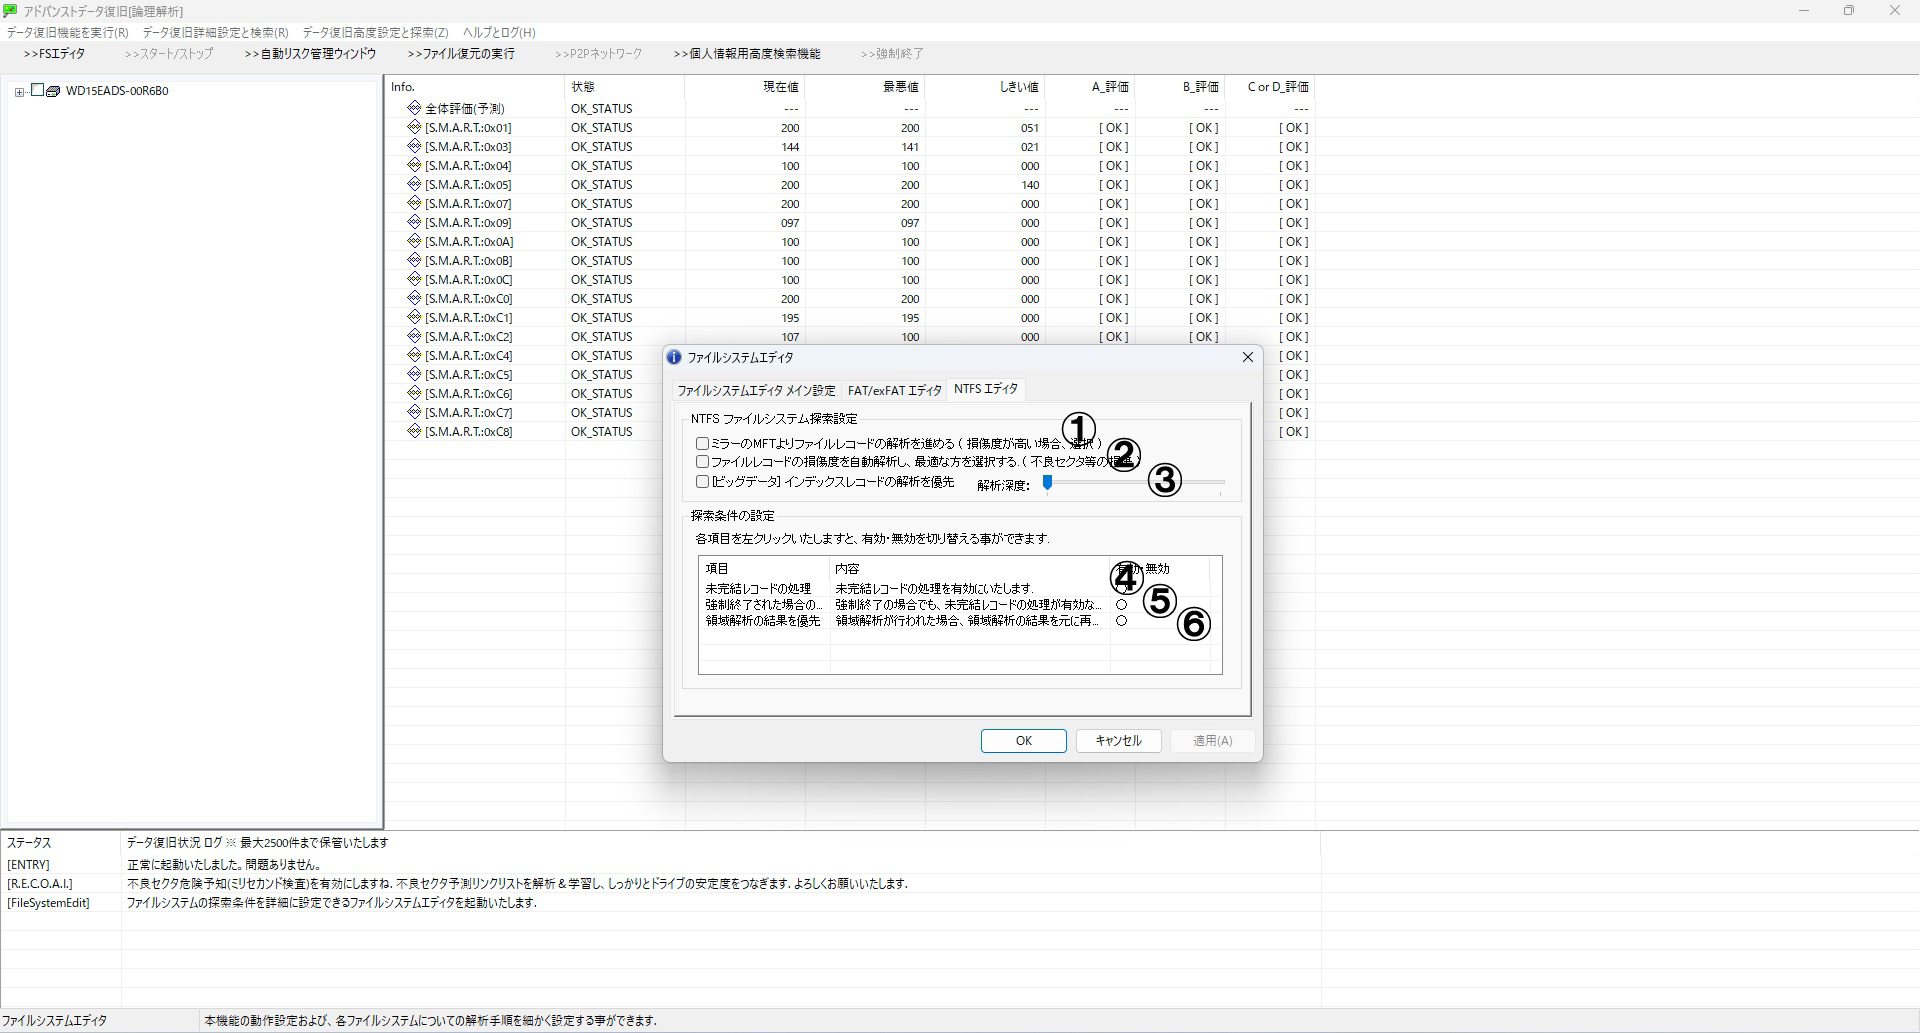
- 「NTFS エディタ」を開きます。
- 2番目「ファイルレコードの損傷度を自動解析し最適な方を選択する」にチェックします。不良セクタによって失われた情報を自動補完する復元モードが有効化されます。
- 「適用」→「OK」で有効となります。
ディレクトリ構造の解析
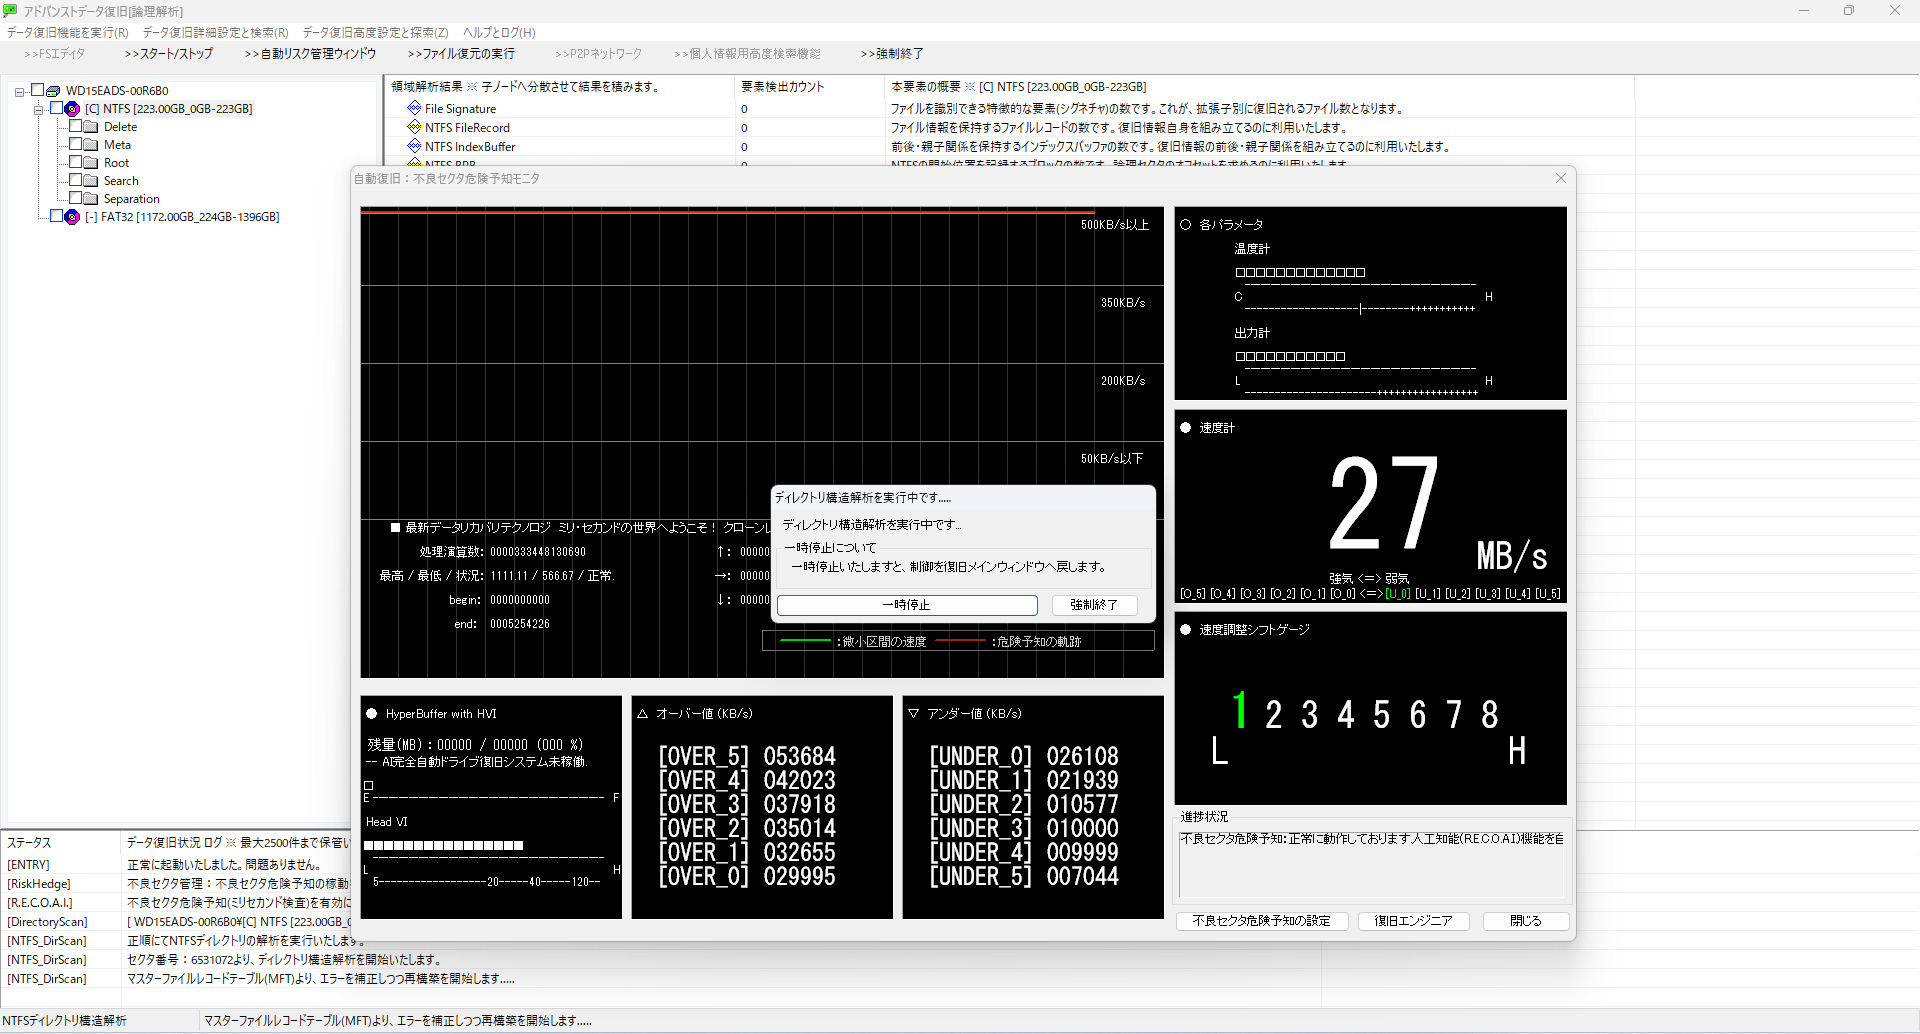
設定完了後に救出対象領域を右クリック → 「ディレクトリ構造解析」 を選択してください。解析には数分を要します。
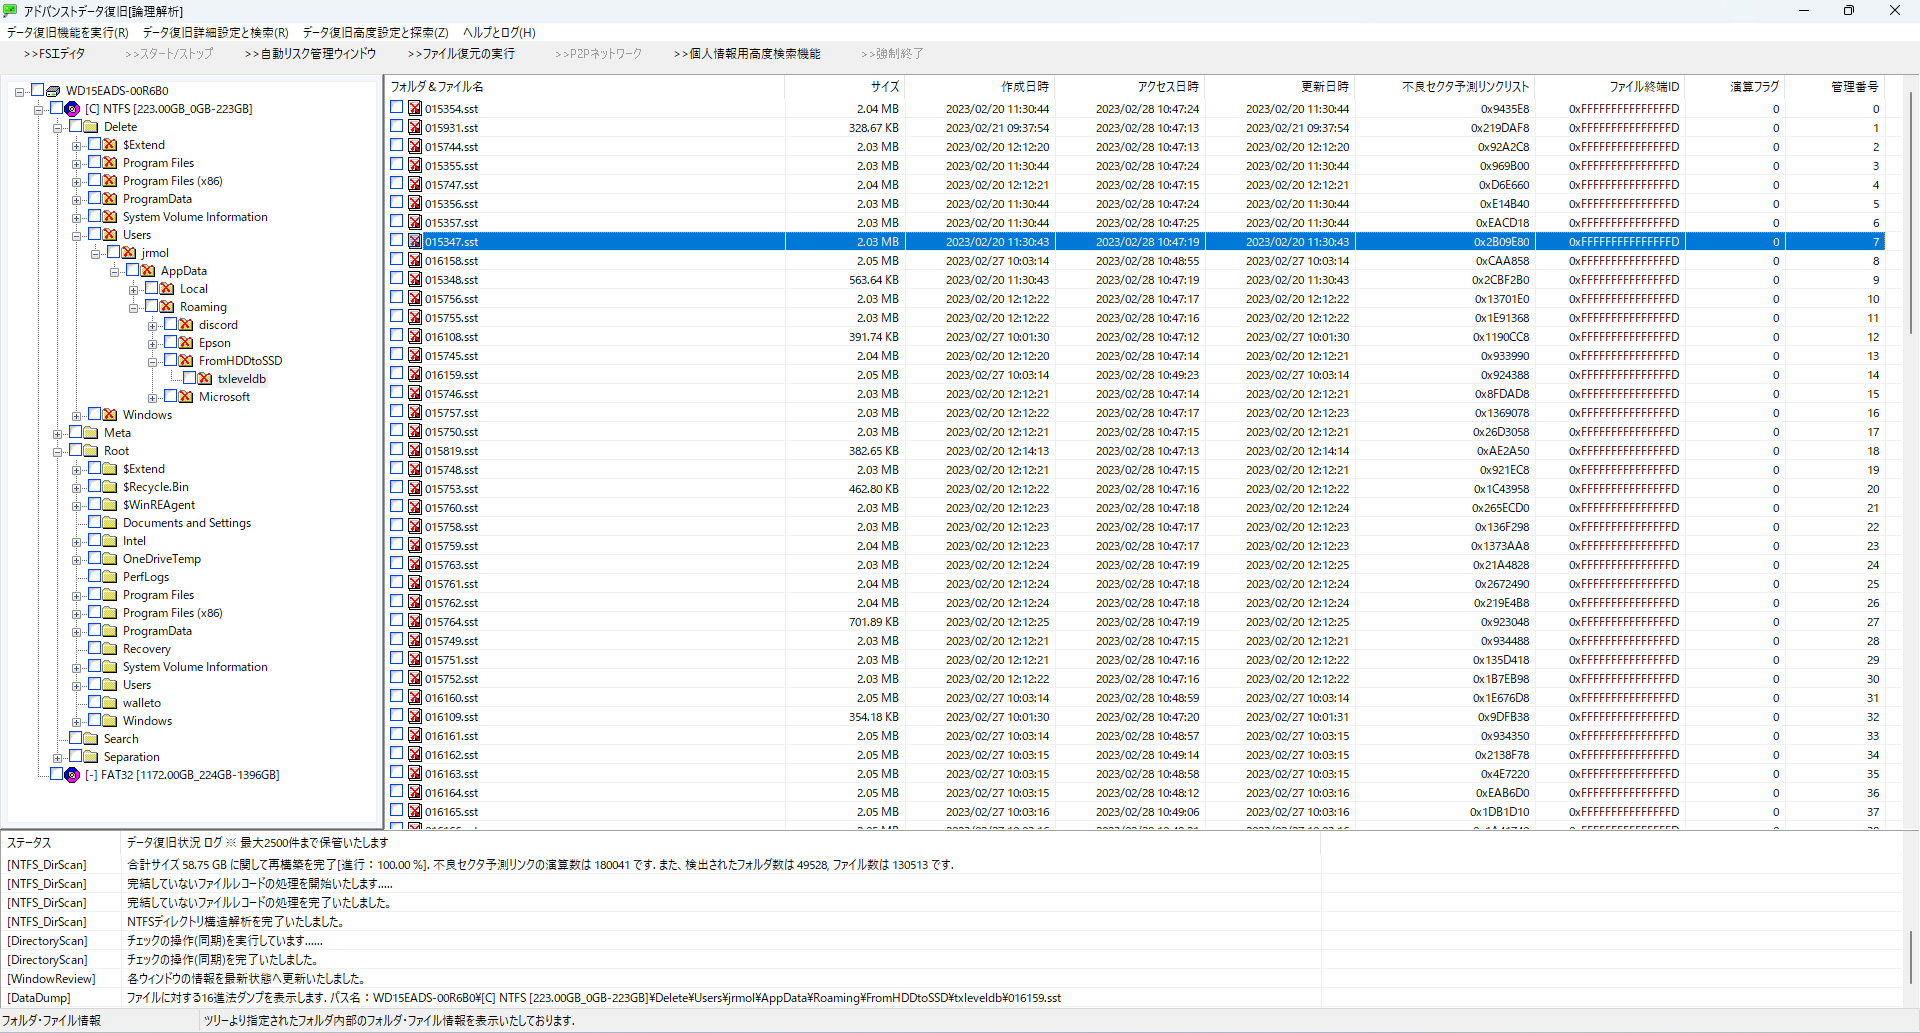
フォルダ構造と意味
- Rootフォルダ:
通常のファイル・フォルダを格納 - Deleteフォルダ:
削除されたファイル・フォルダを格納 - Separationフォルダ:
位置情報を失ったが復元可能な孤立ファイル群を格納
※「Separation」はファイルシステムが壊れていてもデータ群を直接救出するためのエリアです。
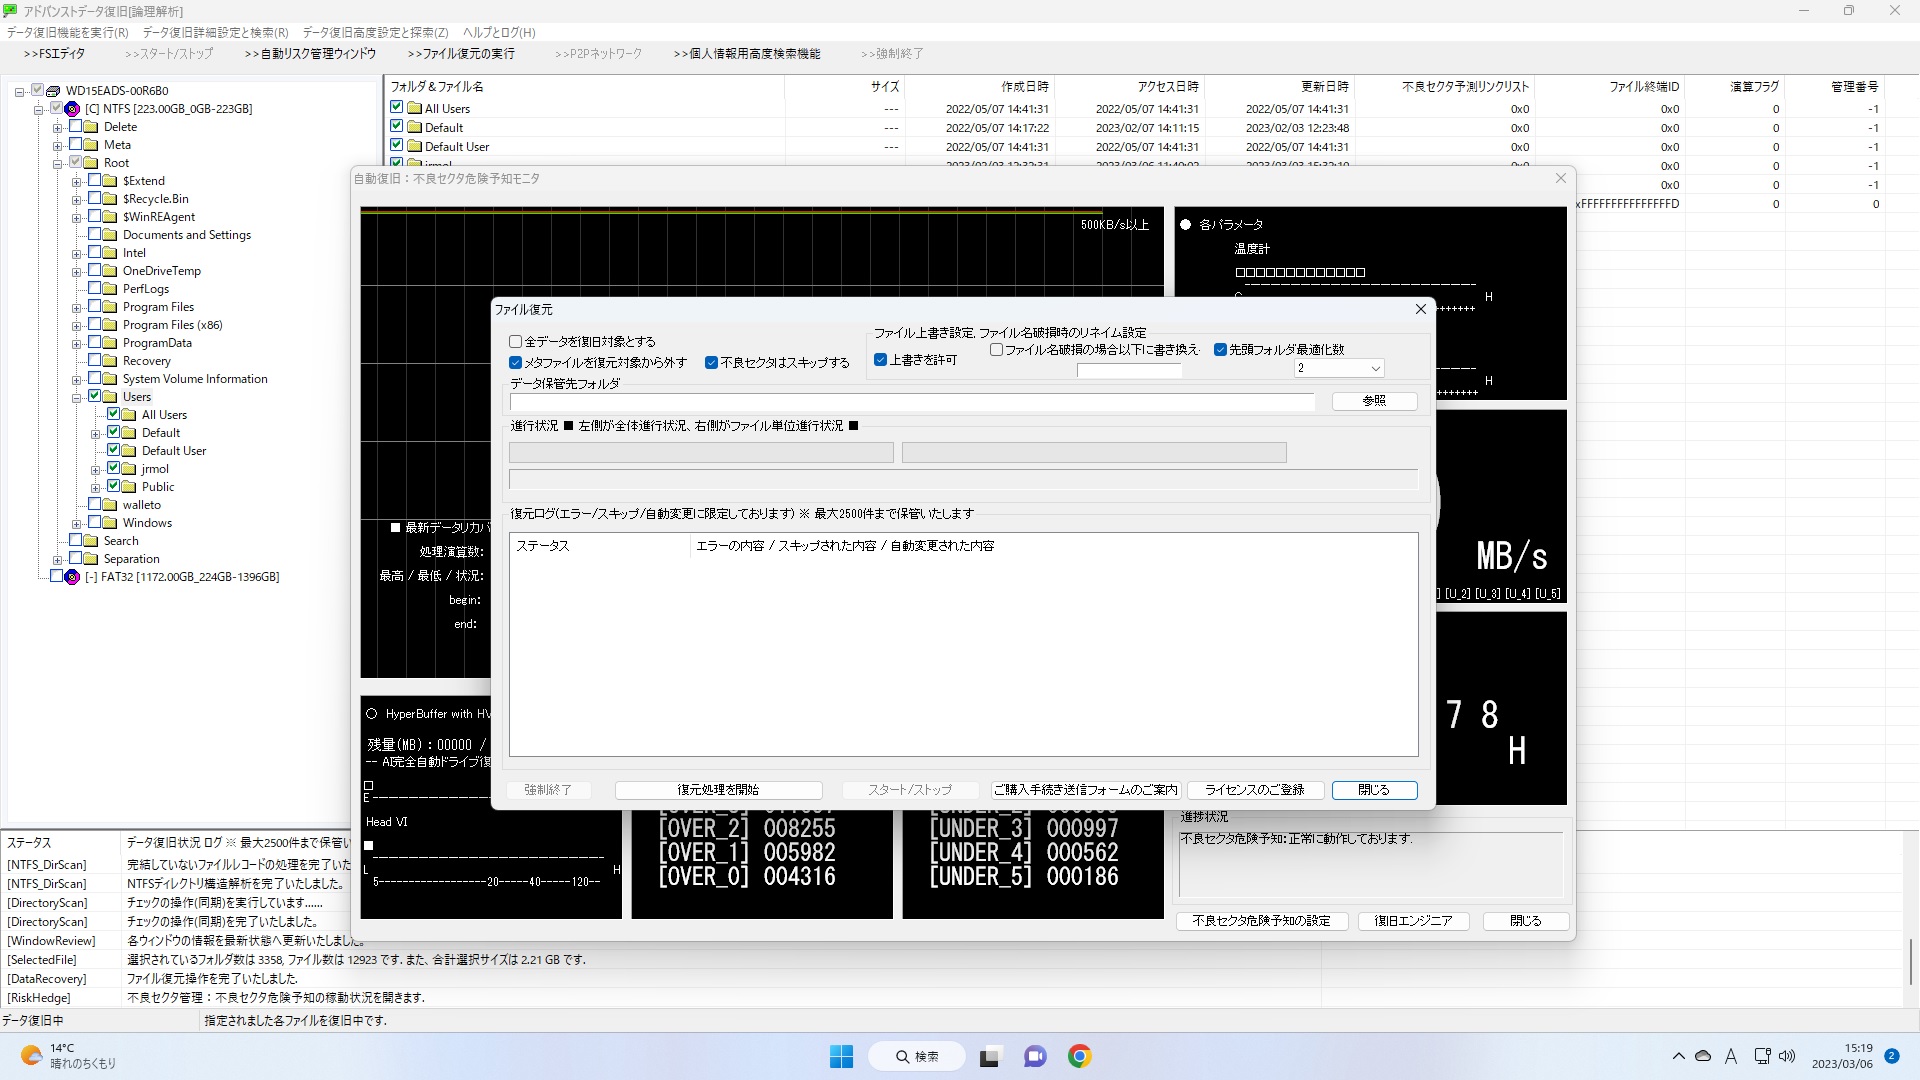
復元の実行
目的のファイルまたはフォルダを選択し「>>ファイル復元」 を実行してください。
FromHDDtoSSD:物理障害に対する復旧設定
物理障害が発生しているドライブに対してはFromHDDtoSSDの専用復旧モードをご活用いただけます。
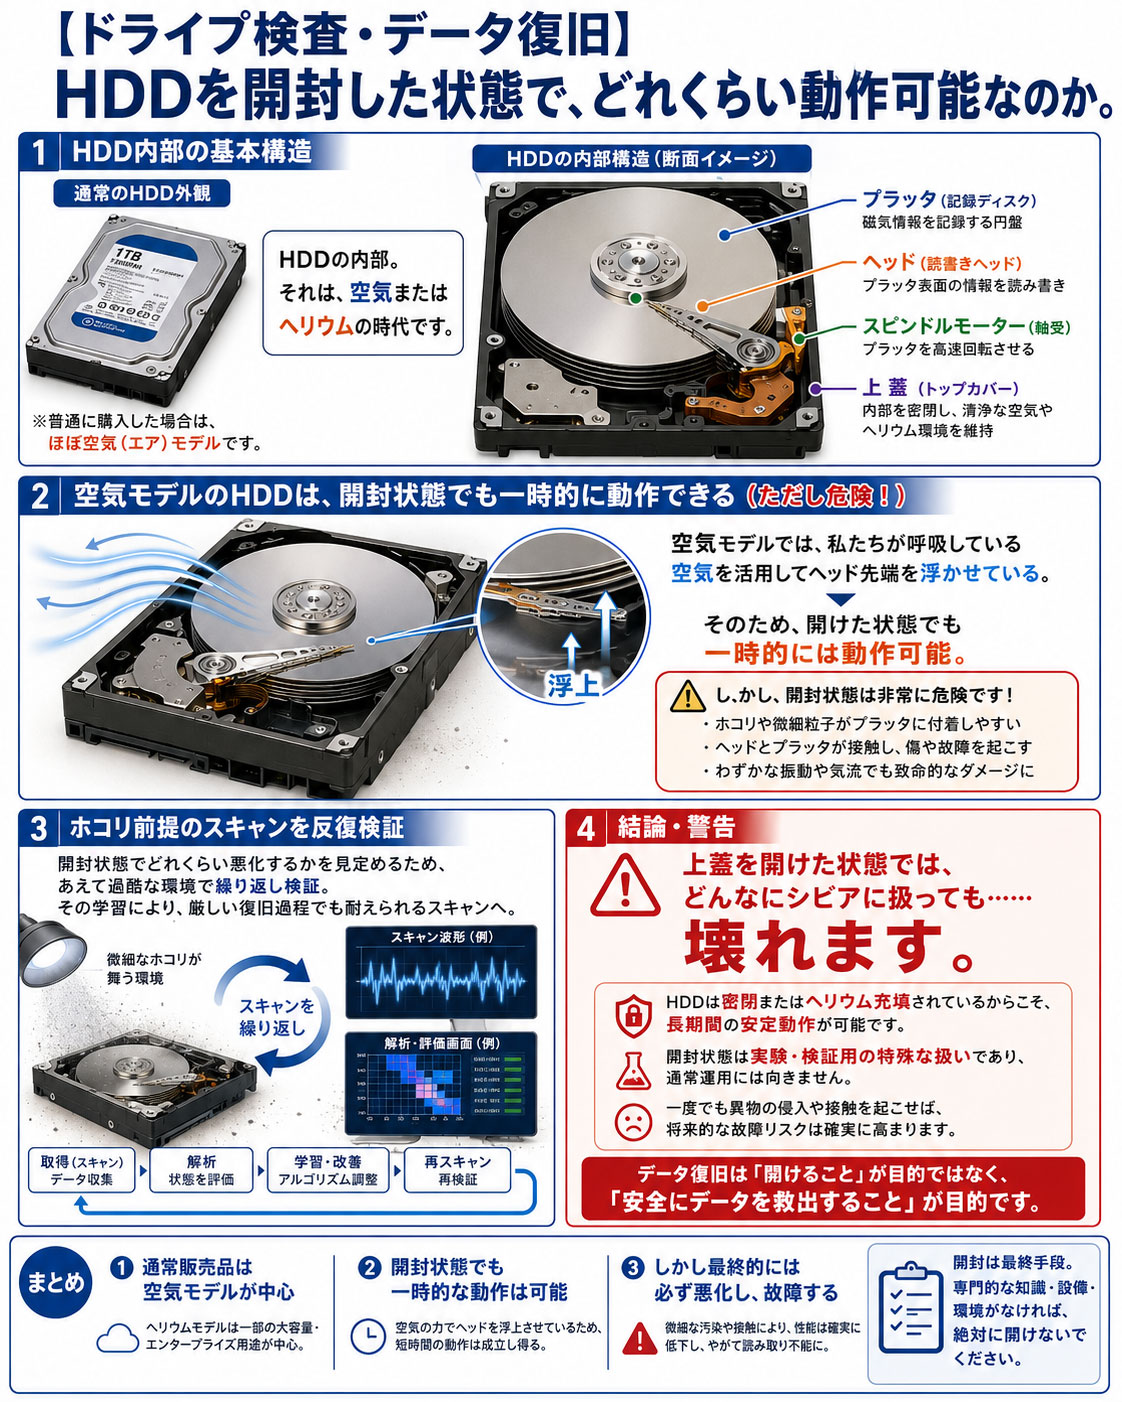
【ドライブ検査・データ復旧】 HDDを開封した状態で、どれくらい動作可能なのか。
HDDの内部。それは、空気またはヘリウムの時代です。
まず、HDDを開封した状態で動作させるには、空気モデルである必要があります。
いわゆる、普通に購入した場合は、間違いなく空気モデルのHDDとなります。これは、本当に、空気です。
わたしたちが呼吸している、この空気です。
この空気を活用してヘッド先端を浮かすことで稼働しています。
ということは、そうですね。ドライブを開けた状態でも、動作させることができます。
それで、復旧過程の開発では、どれくらいで悪化していくのかを見定める必要があります。
そのため、ホコリ前提のスキャンを何度も繰り返して、習得させるように組み込みました。
まあ、検証を重ねる実験みたいな感じですね。 あえて過酷な環境下で、動作させることで、その変化を探っていく実験です。
そのようなシビアな状況を学習させると、過酷な復旧過程でも耐えられる、そんなスキャンが出来上がるのです。
ちなみに、上蓋を開けた状態では、どんなにシビアに扱っても……、壊れます。
ドライブとは、そのようなものでした。
それゆえに、密閉またはヘリウム充填で、5年以上は確実に使えるドライブとなる訳ですね。